Archive | Handstands RSS feed for this section

Yoga Scorpion Handstand Tutorial

The Scorpion handstand is a quite difficult move, where you bend your back and knees while in a handstand and touch the head with your feet or toes. Check out this video from Kino to see how it’s performed and what you can do to achieve it.

Ultimate Guide to Handstand Pushups
Ultimate Guide to Handstand Pushups on Amazon

According to Kino, there are three main things to watch for before trying out the Scorpion handstand, also known as vrischikasana.

First of all, you need to be able to to confidently hold a straight handstand for a reasonable amount of time, like ten seconds.

Secondly, back bend or your spine flexibility needs to be fairly developed to be able to perform the Scorpion handstand. If not, you’ll need to work on improving that flexibility before trying out vrischikasana.

Finally, you need to be relaxed and calm in order to let your body open and avoid tipping forward.

Most people looking to achieve this move do not have much problems with holding a handstand or being in a calm state of mind, but they do suffer from lack of flexibility. Check out this resource to improve flexibility and increase your range of motion. 

Comments { 1 }

Handstand Workouts and Variations

Check out this video with loads of handstand variations. All of these can be used to work on your hand balancing skills or just to increase strength.

Hand Balancing Made EasyHandBalancingMadeEasy_on_Amazon

  • A Regular Handstand
  • Straddle
  • V’s
  • Handstand Cycling
  • Bent Arms
  • Handstand Steps
  • Tucked Legs Handstand
  • Arms Wide Apart Handstand
  • Headspring
  • Walking on your hands

Are you unable to perform some of the moves listed above? Hand Balancing Made Easy has hundreds more variations and will get you started and help you reach your goal as soon as possible. 

Comments { 0 }

Handstand Training – My Ten Cents! – Guest Post by Paul “Coach” Wade

If there’s one thing we can all agree on in the world of strength and conditioning, it’s this: The National Handstand Council (NHC) has done a freaking terrible job of promoting the benefits of the handstand.

Why have they failed? Well, partly because I just made them up. But that’s no goddam excuse is it? Superman is made up, and you don’t see Lex Luthor all up in your face, right? So he did his job. But the NHC? Jesus. Useless. Guys want to work their pressing muscles, and they hit that bench press. Or reach for the dumbbells and do some shoulder presses. Some of the hardcore dudes might work some barbell standing presses. But handstand training? Good luck finding that in a gym, right?

You suck, NHC!!

But luckily the strength world does have a champion for handstand training; a man who has tirelessly promoted the strength and conditioning benefits of the old upside-down work so effectively that he has pretty much become the face of handstands on this here internet. This hero’s name is Logan Christopher. When Dragon Door formed the Progressive Calisthenics Certification (PCC) to instruct athletes in all aspects of bodyweight training, I pretty much begged Logan to get on-board: he’s so much more than “the handstand guy”, but hell, nobody knows handstand training like Logan. History, methods, kinesiology, you name it.

The bottom line: you gotta have those handstands!

I have probably been doing some kind of handstand training since before most of you reading this were born. Bill Pearl used to say that no one approach to training would take care of you for your entire life, and this has certainly been true for me and handstands. In fact, my approach to handstands has gone through at least four different stages.


The Brutal Basics: Wall Handstand Holds

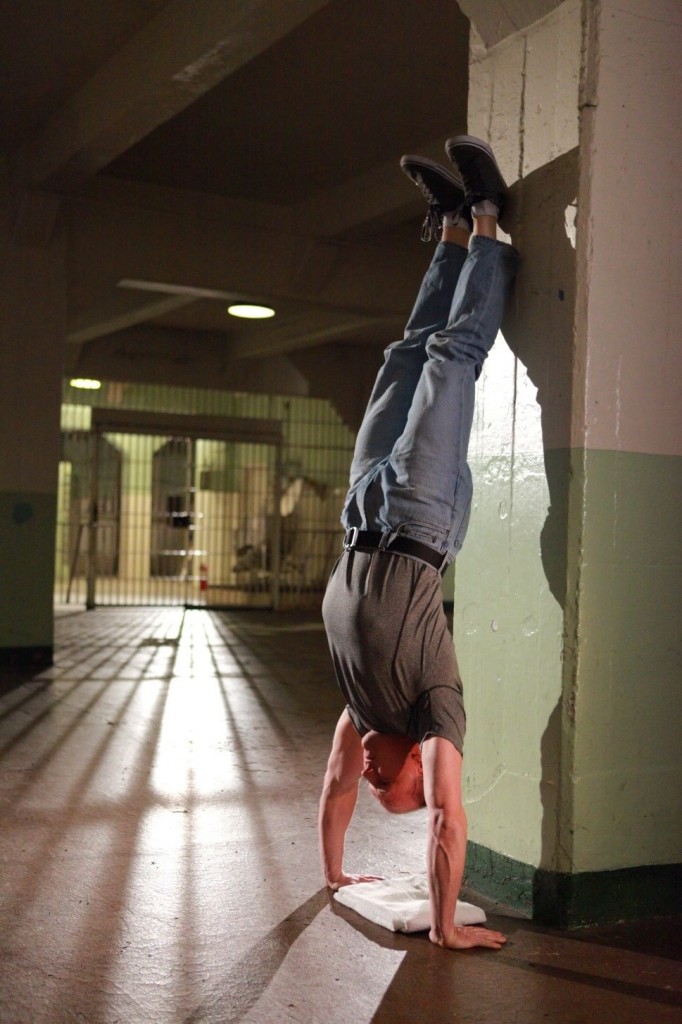
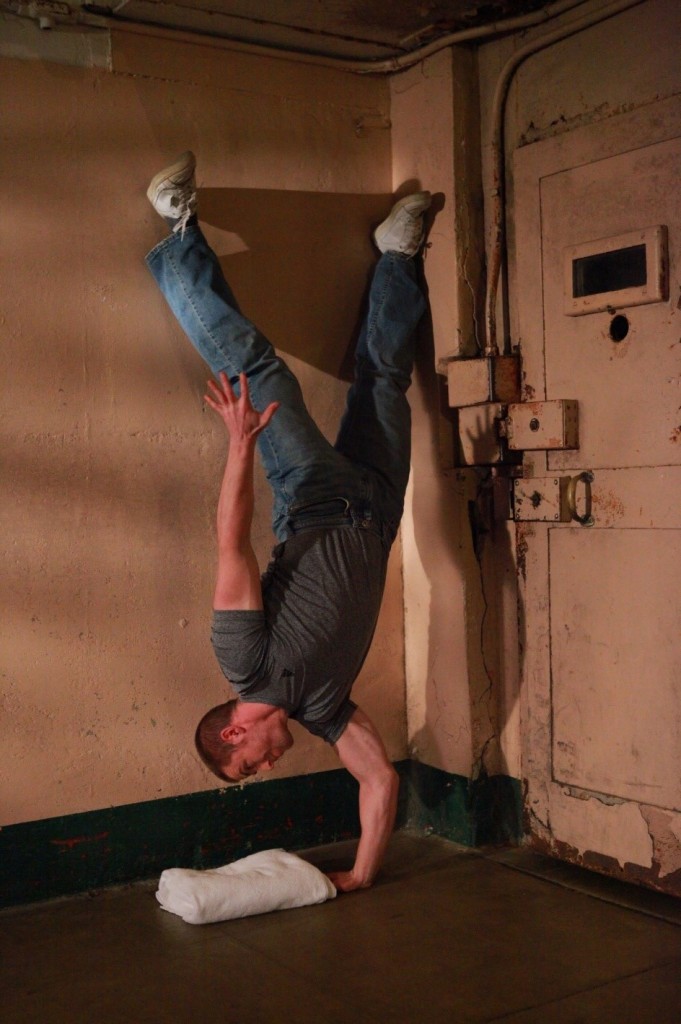
When I first started calisthenics, I basically did two pushing exercises: basic pushups and handstands against a wall. This was in my early twenties, and in jail: no weights, no machines, no benches—nothin’. It seems primitive by today’s standards, but looking back, god damn—what a wonderful way to start off! I’d do pushups to work my chest, triceps and front shoulders, then at the end of the workout I’d flip up against the wall and just try and stay locked out for as long as I could. I knew I was doing great work for my muscles as I felt the burn viciously intensify in my delts, traps and arms. Oh man, wonderful stuff!
Brett Jones

The great Brett Jones holds a perfect wall handstand—in Alcatraz!


I still look back on that early training and thank God I didn’t have access to a modern gym the way today’s guys do. Most wannabe strongmen nowadays sit on their asses on padded benches to press—or worse, they lie down! When you think about the artificial nature of this, you’ll realize how nuts it is. How often in the real world do you ever need to summon huge strength while you are sitting down? Or lying down? Hell, real strength is ground-based. Training while you are carrying your entire weight through the floor forces the entire body to work as a unit to become stronger. Think about it…if this principle is true when your feet are carrying your weight, how much truer is it when your hands are carrying your weight during training?

The answer: much truer. If you want to begin to really tap your strength potential, get on your hands, son.

How to do the One Hand Handstand by Professor Orlick
ow to do the One Hand Handstand on Amazon


In My Prime: One-Arm Work

I trained this way a few years. I eventually got to the point where I could easily hold wall handstands for over a minute, so I switched to one-arm wall handstands. Oh, fun fun fun, boys and girls! One-arm work does stuff for your body you would never imagine. Your joints have to lock harder to support you, training the hell out of those elbow tendons; plus, my hands became hugely stronger. Just supporting your weight entirely on one hand throws enormous stresses through the soft tissues, and even the bones of your mitts. It made my hands tough as hell—and not just my grip, but my wrist strength and finger extensions too. All with no grippers or external weights. In fact, I wasn’t even trying to train my hands!

Over time, I moved away from the wall and embraced old-school hand-balancing. Again, I used very few exercises. I worked with elbow levers, one arm elbow-levers, free handstands, and one-arm free handstands. I didn’t build much more muscle this way; but boy, did I get stronger! Plus, I was learning to use the muscle I had built already. Over time I fused these core techniques into one “super-technique”—the pushup into a one-arm handstand from a one-arm elbow lever. In reality, there’s not a huge amount of “pushing” in this move. Do it right, and you kick up with your legs, building a head of momentum that carries you up. But it is an amazing movement, and I still feel privileged that I ever learned it at all.
 

Max Shank lever

The mighty Max Shank busts out a two-arm elbow lever.

I think it was during this period that I began to understand the true benefits of handstand training. It’s functional—it really teaches you how to use your body as it was meant to be used. I’ve heard a lot of writers diss on bodyweight, especially the idea that it’s a natural way to train. What the hell is natural about a handstand? They say. Well, I disagree with this attitude. Learning to hold the body up on the hands is natural—in fact, it’s practically hardwired. We just choose to ignore it. We are one of very few species that has chosen to walk exclusively on our hind legs—all other species (and our ancestors) naturally also used the forelimbs—the hands. When we are babies we begin to explore the world by crawling, by walking with our feet and hands.  We get up from the floor by pushing through our hands. When we run at high velocity and tumble over, we inevitably spin into a handstand, if only for a split-second. Handstand training is just a scientific extension of these very natural (but mislaid) movement patterns.


HSPUs Convict Conditioning-Style!

When I started coaching guys a few years later, none of them were interested in the arcane arts of hand-balancing. Elbow levers? Shit, why?! They just wanted to get as diesel as they could, as quick and easy as they could. Swole shoulders, boy! So I trained them with handstand pushup progressions up against a wall. Rest assured, I strenuously experimented and “pressure tested” these techniques in my own little “lab”: and just about doubled the size of my deltoids by doing so.

Man, if you’ve never worked your handstands like this, it’s a brutal and super-efficient way to build huge levels of muscle and tendon-strength. You begin with inverse positions to train your body to being happy upside-down, set against the wall. When this gets easy, the handstand pushups begin. Since you’ve pretty much taken the balance element away, all the resources of your body and brain can be devoted to pushing.
 

one hand handstand pushups

With convict-style handstand pushups, who needs barbells?

The effects are not unlike heavy barbell presses, but with one exception: they strengthen and build up the vulnerable shoulder and arm joints, instead of tearing them down. Howcome? For one, the hands are flat—instead of gripping as they push. The old-timers who trained me were convinced that gripping while you push (as in barbell presses, bench presses) causes all the elbow and forearm problems so prevalent in gyms today. The flat hand cures these. (In nature, guys pushing heavy objects always do it with a flat hand. So why do we clench our hands while pushing in the gym?) Also, your elbow and body positioning is much more authentic during handstand work—in the gym, guys are forever pushing their elbows out, putting the bar behind their neck, and so on—this is all unnatural and wrecks those shoulders. Another major point is that your range-of-motion is limited by nature during handstand pushups—yer head gets in the way. This change alone cures a huge amount of shoulder problems.

These progressions went on to become a mainstay of my book Convict Conditioning. I stand by this type of work for bodyweight bodybuilders, and guys who want to build muscle, strength and joint health without the balance element of traditional, free hand-balancing.


OBHB: “Old Bastard Hand-Balancing”

As it stands, my next “big” birthday is a few short years away, and it has a 6 in it…unfortunately, the 6 ain’t on the good side! In the last five or six years, my inverse training has taken another definite turn. I still love being upside-down, but these days I do things different. Gone are the super-heavy handstand pushups against the wall—in their place, I’m back to traditional styles of hand-balancing. I play with stuff like:

  • Perfectly straight, still, free handstands
  • Timed free handstands (with a body-curve allowed)
  • Asymmetrical free handstands (different arm and leg positions)
  • Handstand transitions: bridge to handstand, forward bend to handstand, etc.
  • Walking on the hands
  • Sideways walks on the hands (try it!)
  • Headstands and shoulderstands

This keeps my interest up, maintains muscle and strength, and keeps my shoulder girdle healthy. And more than that—it’s fun for me. After years of grinding out HSPUs, learning to use balance and equilibrium again is interesting. Discovering the similarities between grace and strength is enjoyable—creative, almost. Will I ever go back to heavy asymmetrical unilateral handstand pushups? Probably. Almost definitely, someday. But like old Bill Pearl said, you need to shake your training up if you want to stay interested and in this game for the long haul.
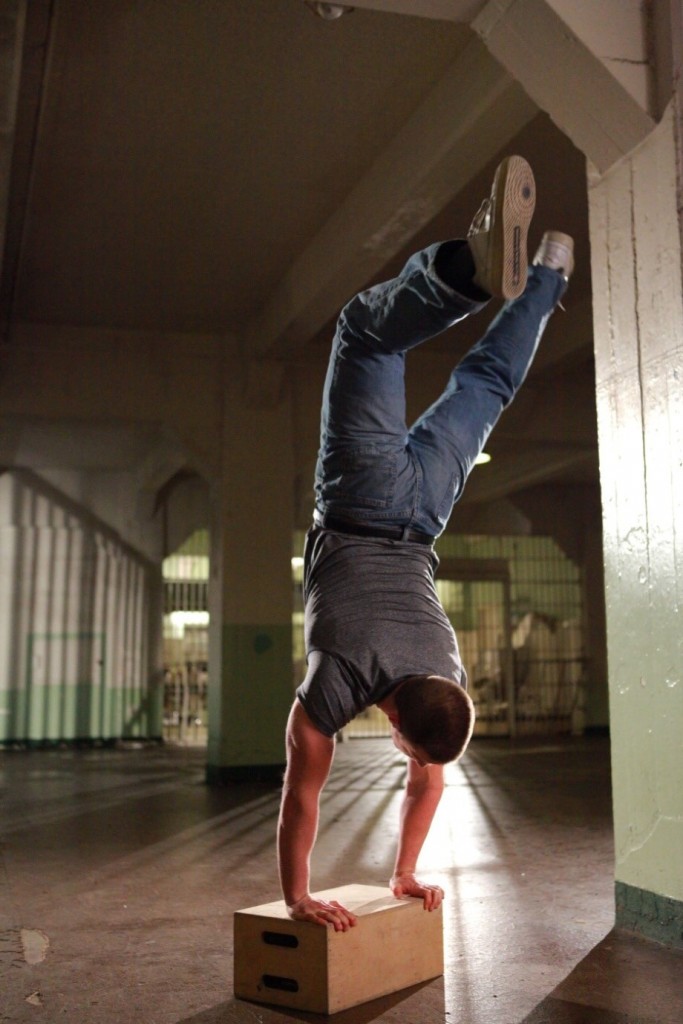
balance and strength

Balance and strength go together better than most folks realize.

In many ways, this kind of training makes me feel like I’m going back to my roots. My first real calisthenics mentor, Joe Hartigan, was a huge fan of handstands, or “inverse work” as he sometimes called it. For Joe, the most important element of this type of exercise wasn’t muscle or strength gain at all—it was the fact that you were upside-down, or “inverse”. He was convinced that spending time wrongside-up had amazing health benefits, like flushing the lymph system, toning the circulation, and filling the brain with large volumes of fresh blood (he felt that this “fed” the pineal and pituitary glands, the “master glands” of the endocrines, thus optimizing hormonal output). In fact, Joe lumped headstands and shoulderstands into the same group of exercises as handstands. He often performed simple headstands for prolonged periods. I sometimes thought he was crazy—and I wasn’t the only one—but his results weren’t crazy. The guy was a strength legend, pretty much up to the day he died.

Handstands and hormones? Maybe kid. Maybe.

***

So perhaps you can see just from my own brief training bio that there are many ways to skin that cat…many ways to work on those hands God blessed you with. Which is the “best” approach? Basic handstands, gymnastic elbow-lever tricks, HSPUs against a wall, or old-school hand-balancing…?

Hm. Let me answer this way. For many years I was kind of obsessed with finding the ultimate method of calisthenics. But since working more closely with Al Kavadlo—the greatest calisthenics coach in the world—I’ve realized that there is no ultimate way. If you are enjoying your training, and getting better without screwing up your joints, hell, you are winning the game. That’s what it’s all about kid.

Now go get on your hands.

Paul “Coach” Wade is the author of the best selling books, Convict Conditioning and Convict Conditioning 2. These books are a must have for anyone interested in bodyweight training.


Comments { 11 }

Handstand Rebalance Drill

In this video Yuri Marmerstein presented a great way to further increase the strength and balance for a handstand.

Tumbling Illustrated
Tumbling Illustrated on Amazon

It may not look like it, but Yuri is actually trying to get out of balance on purpose. As he tests the limits by leaning forward and backward, Yuri is developing and isolating different reactions to stay in a balanced position. He says that after you manage to isolate those reactions and develop reflexes, you are ready to try and take your balance out of the center as much as you can without falling down, but bringing yourself back to the handstand position instead.

The goal of this workout is to gain better control over every movement in the handstand and strengthen your core. I first came across this drill in The True Art and Science of Hand Balancing by Professor Paulinetti and Bob Jones. Its great for the control necessary to do advanced stunts, or just stand in a handstand for a long time (because you need these skills to save the balance.)

Comments { 0 }

Balancing Compilation

This video contains a number of amazing balancing moves, including one arm handstand, human flag, headstand on a head, hand-to-hand handstand and many extraordinary feats from circus performers.

Trampoline Handbook
Trampoline Handbook on Amazon

A video that left the biggest impression on me was the one with a circus guy who went up and down stairs on his hands. What’s your favorite one among those in the video?

In case you want Professor E.M. Orlick to teach you how to learn a one hand handstand, make sure to check it out here. 

Comments { 0 }

How To Breathe Properly in A Handstand – Guest Post by Ryan Hurst

When you first try a handstand, there are just so many things to think about. Your hand and shoulder position, where to direct pressure through your hands, hip and leg positioning, and every other detail from head to toe.

With all the things you have to think about in the handstand, it’s pretty easy to forget about your breathing, and the tendency is to hold your breath. Well, that’s not a great idea. Along with raising blood pressure there is a chance – albeit small – of passing out when you hold your breath.

Obviously, passing out when you are upside down is not good!

Ryan Hurst One Hand Cane Handstand

Ryan Hurst doing a One Hand Handstand on canes.

Holding your breath is a natural habit though, especially in difficult exercises that require a lot of concentration. The handstand certainly qualifies as that kind of exercise.

In the video below I talk a bit about how I monitor my clients and teach them how to avoid holding their breath. It’s definitely best to have a coach or training partner right there to give you cues and help you, but even if you don’t have someone available, the techniques I’ll share with you can be immediately applied in your practice.

Signs You May Be Holding Your Breath

We receive a lot of different questions from our training clients, and one of the more common issues when people start practicing handstands is a feeling of increased pressure in the head and around the eyes.

Some of this pressure is just a minor phenomena that changes for the better with more practice and improved technique, but breath holding is a very likely culprit.

You also may notice fatiguing much more quickly than your current level of conditioning would indicate. Holding your breath while muscles are actively working is not just dangerous, but it will also decrease your performance. Hard working muscles require the increased oxygen intake and carbon dioxide expulsion to work properly and well.

Also common are sensations of lightheadedness and dizziness. I shouldn’t need to tell you this is a bad thing to happen when you are upside down practicing handstands.

Another sign is that when you end a set you hear yourself loudly exhaling. The exhale was loud because you were keeping your air by holding your breath.

How To Keep Breathing

One of the techniques I use with my clients is to simply engage in conversation with them. It’s impossible to be holding your breath and talking at the same time. Along with keeping them breathing and alive (kind of important), it also helps them to focus on just a few points at a time. This is important, not just for the handstand, but also when doing other exercises that require a lot of concentration and practice.

Another way I keep my clients breathing is by having them recite a favorite phrase, or something like the alphabet, over and over again. It might be a bit boring, but it gets the job done.

Other Tactics for Smoother Breathing in Your Handstand Practice

Treat handstands as a skill, not as an exercise in which to get tired!

The key to improvement in a skill is consistent practice with as good technique as you can muster. If you keep pushing into fatigue too often, you may end up ingraining poor form.

RyanteachingHS

Ryan teaching body alignment in the handstand

Trampoline Handbook
Trampoline Handbook on Amazon

End the set when your breathing becomes labored and then try again when you’ve caught your breath and can control it.

These basic but important strategies for breath control in a handstand will keep your practice safe, consistent, and successful.

Author Bio

Ryan Hurst is the Program Director for GMB Fitness, with over 20 years of experience in strength and movement coaching. He holds black belts in Kendo, Judo, and Shorinji Kempo, and he practiced for 10 years as a competitive gymnast. These days, Ryan spends most of his time playing with his kids and helping others move better.

Comments { 2 }

Straddle Press Handstand Drill #7

Another lead-up drill for Straddle Press Handstand is One Leg Press Handstand, a drill #7.

Trampoline Handbook
Trampoline Handbook on Amazon

As you can see, in this drill you’ll kick-up into a freestanding handstand while lowering only one leg and keeping the other one in the air. By staying in that balanced position, you’ll increase your dynamic flexibility. Initially, you’ll only be able to lower one of your legs just a bit before coming back up. After a certain amount of practice you’ll succeed in touching the ground with that leg and come back up without the kick-up.

As you can see in the video, that bottom range of motion is still a bit difficult for me and I had to use little momentum in order to come back up. Even though I only started practicing this drill recently, it’s a great one. By using only one leg, you’re basically learning to control your entire bodyweight in that dynamic manner, which is essential for performing the straddle press handstand.

Comments { 0 }

How to Hold a Handstand Longer

When it comes to holding a handstand, there are many factors to consider. Here you can see the most important ones explained by a very skilled guy named Chris Silcox.

To start practicing, do a handstand against the wall and slowly take one leg off at a time while finding a balance. When you find your “sweet spot”, pay particular attention to your fingers which pretty much act as feet while you are upside down. Much like toes, fingers are engaging and releasing in order to keep us in balance. Another good tip is to learn to manipulate your shoulders and elbows to prevent going off balance.

You may also want to start the other way around, with your face facing the wall without arching your back. Try to get your fingers as close as possible to the wall and start balancing. Go for one leg at a time like before and make sure to use your fingers to prevent falling to the other side. You can also move your shoulders to the wall to avoid the same problem. If you don’t have a spotter, the best way to come out of this position is to walk your feet down slowly.

Have fun!

Ultimate Guide to Handstand Pushups
Ultimate Guide to Handstand Pushups on Amazon

P.S. Check out Hand Balancing Made Easy for all information you’ll need to learn how to balance on your hands.

Comments { 0 }

Handstand Evolution

An interesting video by Dave Durante where he explains his take on a proper handstand form.

Dave begins the handstand with slightly bent arms and knees bent at 90 degrees, which should represent the worst handstand form.

Trampoline Handbook
Trampoline Handbook on Amazon

Instead, the feet should be together with arms and knees locked out, which really is a classic curved handstand. It’s worth mentioning that Dave consider this form to be less stable than a straight handstand, which is debatable and depends on other factors. To go from the curved to the straight handstand, press your toes up, open up the shoulders and find your “sweet spot” for balancing.

Going from the first handstand position, to the curved handstand and finally to the straight handstand does require a lot of practice, so it’s definitely not for beginners.

If you are looking for a way to perform your first handstand as fast as possible, check this out.

Comments { 6 }

Handstand on Rings

The handstand on the ground is fairly tough but easily doable with a little practice. The handstand on rings is much, much tougher.

Here we have Jim Bathurst on the rings working on his handstands.

Hand Balancing Made EasyHandBalancingMadeEasy_on_Amazon

What makes ring handstands harder to do? You can’t use your wrists at all in order to balance like you can on the floor or parallel bars. Instead all the balance must be done from the shoulders and by bending the arms as you can see Jim do quite a bit.

The truth is ideally you don’t want to bend your arms just like in a normal handstand, but when you’re first starting out it may happen. Try to avoid it though as it can set in bad habits.

The easy way to do a handstand on the rings is to wrap your legs around the straps. This is comparable to doing a handstand against the wall. Of course the freestanding ring handstand and that against the straps is like a freestanding handstand versus one against the wall, just the rings both are a jump in difficulty.

Still if you work on handstands on the rings your balance will grow that much stronger.

Some other lead up stunts to it would include shoulder stands on the rings and many other skills.

To buy gymnastic rings for training go here.

For a great course on strength training on the rings go here.

Comments { 0 }