Archive | One Hand RSS feed for this section

The First Stunt of 2017: Part 1

There are a number of different possibilities that will lead up to your first handstand. In fact we recommend 5 different lead-up stunts or body skills that can help you achieve this feat.. Whether its the Frogstand, Headstand, their variations or even today’s topic; you’ll gain a valuable piece of information that will help you progress to your goal or even build up to other goals.

Honestly, these lead-up stunts aren’t necessary to get your first handstand, but they build a pathway that can make it easier. All of these body skills share common traits to the handstand and therefore pave the way towards good handbalancing.

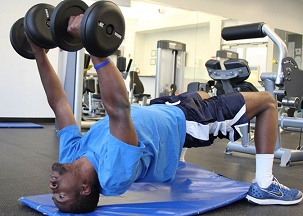
The different skills each put you into an inverted position,  develop strength, balance and the motor control necessary to perform a handstand.

So without talking the skills up too much and not delivering, lets give you more insight on the move at hand:
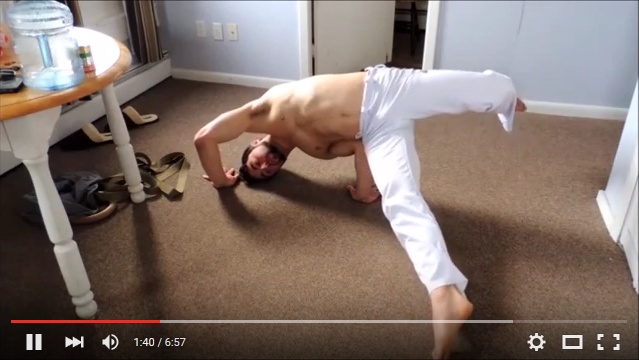
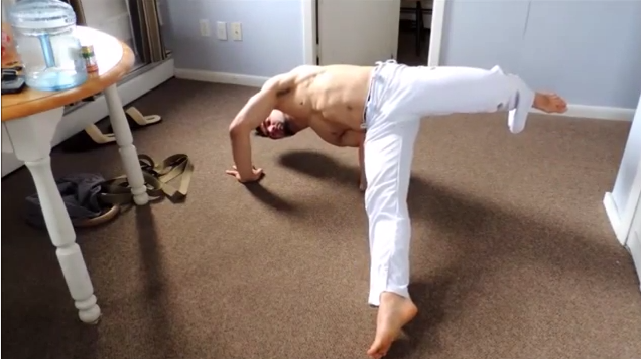
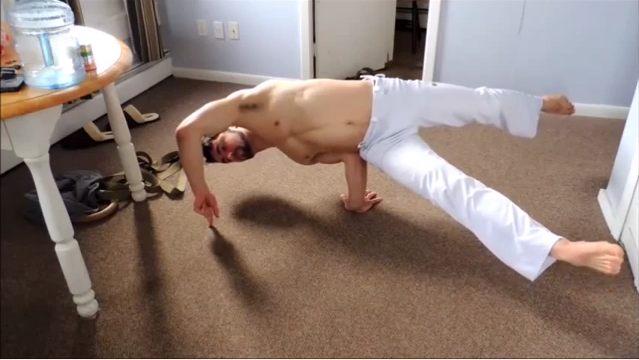
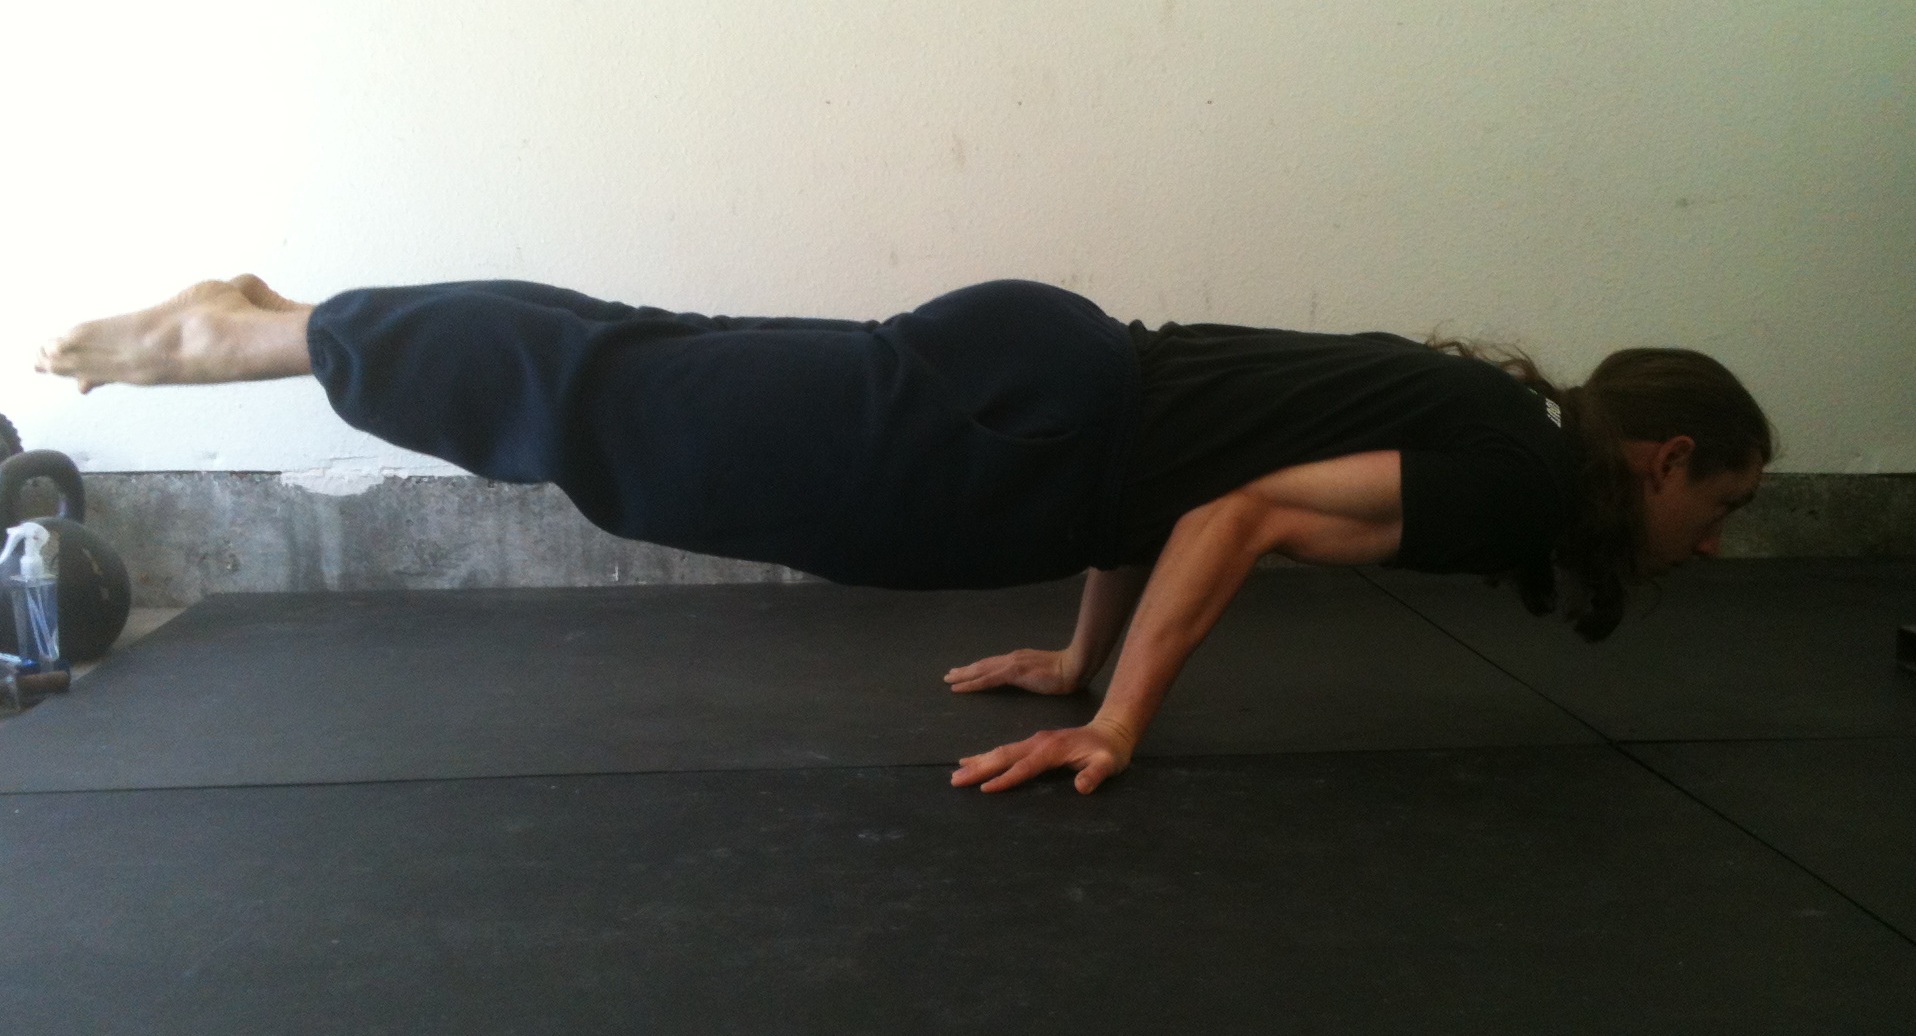
The Elbow Lever

Walking and Jumping On Your HandsWalking and Jumping On Your Hands on Amazon

Elbow Lever

Don’t let this move scare you. It is an advanced Hand balancing skill and I’m only starting off with it to give you a long term skill to shoot for. Also, if what I’ve been saying is true, you’ll be able to gain some valuable experience towards you hand balancing Journey.

To perform this lead- stunt kneel on the floor, bring both elbows together and place them in your stomach and turn the palms of the hands facing upwards. Now lean forwards slowly and place the hands flat on the floor with your fingers pointing backwards. Arch your back slowly until your toes leave the floor and you will be doing the elbow lever.

You will find the balance a little difficult at first but just keep on practicing. The stunt can also be performed on the edge of a table or on the end of any ordinary bed.

Now that you know how to do an elbow lever, we challenge you to go ahead and give it a try. Also if you want some pointers, try posting a video on our facebook page and we’ll be there to direct and support you development in your hand balancing journey.

Stay Inverted
-Jonathan Magno

BTW if you want to skip some of the process and guesswork toward building you hand balance skills, check out our handstand mastery course.


Comments { 0 }

A broom, your body, and handbalancing!

Everyone has done this at one time or another. A broom is a common item but any long straight object will do just fine.

Put one end on your open palm with the other end straight up in the air and keep it there by balancing.

This is not very difficult and let me tell you why. The broom is straight and solid. Your efforts at balancing it from the bottom translate straight up to the top so it is quite easy to keep it in the air.

Of course, this is related to hand balancing. However, there are some big differences.

Your body is not just one straight long object. You have mobile joints at your elbows, shoulders, hips, knees and ankles. And then there’s your spine which has many moving pieces.

Hand Balancing Made EasyHandBalancingMadeEasy_on_Amazon

This is not an anatomy lesson. My point is that your efforts of balancing on your hands may not directly translate to keeping your feet in the air.

Your target must be keeping your body from wrists to toes unmoving so that you can balance.

Keeping your body tight is the key to holding a quality handstand. Any leak means getting out of proper position and a much tougher time getting back in.

So stay tight, but don’t forget to breathe.

In the beginning all this is not as easy as it appears, especially when you are in the unfamiliar upside down position. But keep practicing.

When you can keep your body rigid then handstands are a piece of cake.

Stay Inverted!
-Jonathan Magno

P.S. Although this post is about keeping a straight line, sometimes you need to be a bit more bendable or flexible. Increase your body’s strength and mobility by working on your handstand pushups.


Comments { 0 }

Friday the 13th: Some Positive Motivation!

It’s officially the first Friday the 13th of the year. To move you all through the day with positivity, we have a motivational video coming from Metin Dabak.

Not only did he manage to perform 50 handstand pushups in five sets, but he claims to have done them in supersets with weighted chin-ups.

Test yourself this weekend and see if you can complete the same challenge!

The True Art and Science of Hand Balancing
The True Art and Science of Hand Balancing on Amazon

Stay Inverted!
-Jonathan Magno

P.S. If you need help with your handstand pushups, check out the Ultimate Guide to Handstand Pushups to learn how to perform them as soon as possible.


Comments { 0 }

Underwater Handstands and where to spot?

Is doing an underwater handstand a good idea? Read below for that and other questions from readers like you. Remember that if you want your questions answered just email them to me. I can’t personally reply to all of them but I will post them for all to see.

Here’s the first one:

Thank you so much for the good tips. I am just a beginner of the hand stand on land. I already know how to do headstand (“King of Yoga” ). I also do good hand stand and hand walk underwater in the swimming pool at my local LA Fitness. In fact I handwalked the entire length of the pool in one breath few days ago. But I find it much more difficult to do hand stand on land. Shall I keep practicing underwater hand stand and hand walk while trying to learn hand stand on land? Will I pick up “bad habits” while doing the underwater hand balancing?
Best regards, Brian Ko

Now I have never heard this one before. Not having practiced in the water it is hard to say for sure but here are my feelings.

Water is going to give you some resistance for you to push off of. This is why it is easier. When you balance on land you cannot push off the air in this manner. I imagine that you will be balancing with your body rather than your hands for the most part. If you want to be able to do a handstand on land then you should be practicing that.

The other thing is holding the breath. Obviously this must be done if you are underwater, and unless you have great lungs you won’t be able to balance for a long time. However, in hand balancing you do not want to hold your breath. A big key, and also something hard to learn, is to be able to breathe normally when you practice.

My advice is to stick to the land. It is harder but you will get the hang of it. There may be some benefit from practicing underwater but I the time would be better spent on solid ground.

And from our friend Seth:

Hello, I was wondering where is the best place to look while you are in a handstand, I find myself always looking at the ground, but recently I started trying to look forward and keeping neck straight. Which way is correct? Thank you for all your help it is very much appreciated.

Both are correct depending on what you are going for. Most of the time I look at the ground. I find this position easier. Remember that the back tends to follow the head, so if you are looking at your hands then you will naturally arch.

Now if you look forward then your back will straighten out and this will give you the straight handstand look and feel. Once you get use to this position it can be just as easy as the other one.

It all depends on what you are going for but both are correct for hand balancing.

That wraps it up for today.

Good Luck and Good Hand Balancing,
Logan Christopher

PS   Jonathan here! If you need more guidance in 2017 toward your handbalancing goals, try out our Handstand Mastery Program!


Walking and Jumping On Your HandsWalking and Jumping On Your Hands on Amazon
Comments { 0 }

Make Haste Slowly, A Late Start to 2017

2017 day 4. If i had my way I would have given you this advice on day 1 of this year inspiring you and guiding you towards your right track. Unfortunately, things don’t always work out that way. Each day of 2017 has involved an odd occurence. Had my phone pick-pocketed from me on the first day, hurt my back on the second, and we move forward. If I had the capacity to turn back time and redo, I would. Unfortunately that isn’t the case.

Much in the same way with your training. If there was a pill that you could take, that would immediately transform you into a world class hand balancer, would you take it?

YES I would! Unfortunately, there is no such pill.

Becoming a great hand balancer requires work and perserverance. Lots and lots of work. Especially if you “start late.”

The problem is that the more you want it and push for it sometimes the farther away it seems.

The worst part of learning any new stunt is the frustration when you just can’t get it right. So you keep on pushing and only get worse it seems.

When you are going after a handstand, and mind you this applies to any trick, as soon as you fall out of balance you may want to kick right back up again. Trying to force the situation will never help.

Whenever this happen take the time to step back. Take a deep breath and think about how you can do better. Don’t over think the process, but analyze your technique and realize if you are doing things correctly.

Now go at it again with optimism.

If you throw yourself into a hand balance you may feel like you can get more work in a shorter amount of time. Maybe you get one in ten to stick and you feel like you are progressing.

Ultimate Guide to Handstand Pushups
Ultimate Guide to Handstand Pushups on Amazon

The question to ask yourself is do you want to go about this haphazardly or in the correct manner?

I am hoping you answered with the second option. You need to start slowly in order to make progress in the long run.

Going after the handstand with no prior skills is a hard way to do it. Learning the position and hand control with exercises like the Frog stand and Head Stand will give you two steps in the right direction.

Don’t just go after the One Hand Handstand by getting into a normal handstand and raising one hand off of the floor quickly. Practice handstands with a smaller base of support or with one arm elevated up.

Don’t be too anxious to get to your goal or you are putting obstacles in your own way.

If you needed to cover a distance of 30 feet would you try a broad jump or walk each step at a time?

I am as guilty of this problem as any of you. What we need to do is realize how much assistance exercises and lead-up stunts can help, use them, and in the end we will make progress faster.

By breaking your goal into easier steps along the way you will get there with haste.

Stay Inverted!
-Coach Jon

PS   If you need more guidance in 2017 toward your handbalancing goals, try out our Handstand Mastery Program!


Comments { 0 }

Bodyweight Strong 2.0 – Old School Strength

There are numerous bodyweight training programs that litter the fitness industry, but many of them target calorie burning with no attention to strength development. After all, the hand balancers of the past didn’t seek calorie programs — they sought strength, and they achieved it through bodyweight training.

For a man weighing 240lbs to do a one arm handstand, you need more than just a calorie burning program

For a man weighing 240lbs to do a one arm handstand, you need more than just a calorie burning program


After all, physical culture was loaded with men of incredible strength, so why create a program that wouldn’t allow the men of that time to match up to their counterparts? These were men who understood the importance of proper progression, so sought to increase, for instance, the difficulty of their pushups rather than how many they could do. If they could manage 100 pushups, they would elevate themselves or do one arm pushups to increase the difficulty, rather than just shooting for 200.

Furthermore, very few physical culturists emphasized training to failure. “Whoa, hold on, I was always taught for weightlifting to train to failure for the most gains.” Well let me tell you that Sig Klein, one of the most renowed weightlifters and bodyweight trainers in history, as well as Maxick, a master muscle controller with incredible lifting feats, never advocated training to failure.

Sig Klein is the kind of man you'd want to listen to about training

Sig Klein is the kind of man you’d want to listen to about training

When it comes to bodyweight training, you want your nervous system to be fresh and gain energy from workout to workout, rather than have it depleted. Thus, they focused on consistent, daily training, which would overly tax your nervous system if you trained to failure each time. In fact, the more you advance in bodyweight skill, the less you’ll want to train to failure to improve skill and prevent injury. Failing during, for instance, a handstand pushup wouldn’t quite have a Cinderella ending.

One of the main reasons that people have trouble doing a handstand is that they simply haven’t trained it enough. If your goal with a single handstand session is to feel the burn in your shoulders until they’re essentially numb, you’ll have a much more difficult time progressing with a handstand than if you practiced daily with consistent progression.

Learn How to Back Flip in 31 Days
Learn How to Back Flip in 31 Days on Amazon

Body Weight Strong 2.0

Bodyweight training balances you as an athlete, and introduces you at a skill level that anyone can begin with — their own weight. If you can learn to truly master your own weight, your strength can skyrocket. In addition, you may not take your weight set everywhere, but you take your body everywhere, so the training convenience is bar none.

These legendary physical culturists knew the proper way to train bodyweight, and Forest Vance is the kind of man who understands old school bodyweight strength. Luckily for you, he has created a program with a contemporary understanding on classic strength philosophy. Plus, there’s thorough video instruction for you to follow every step of the way.

In basic terms, Body Weight Strong 2.0 can evolve your strength to reach incredible levels just as true bodyweight training should do.

Comments { 0 }

Irradiate Your Path to Handstand Mastery

If you’ve ever been inside a gym, I’m sure you’ve seen it: the classic gym bro doing bicep curls, perhaps easily at first, but soon devolves into using practically his entire body to curl the weight.

Although personally, when I see a weight, curling it isn't my preference...

Although personally, when I see a weight, curling it isn’t my preference…


What you’re actually watching is the law of irradiation, one of the Sherrington laws. What it means, in essence, is that you can contract other muscles in your body to strengthen the one you’re applying force with. If you’d like to experiment with this, try tensing your glutes the next time you shake someone’s hand; you’ll find that your hands can actually apply more force with the handshake.

Let’s review the curling gym bro again. As he continues to do the bicep curls, his biceps get tired and lose their strength of contraction. To compensate, his abs, forearms, lats, glutes, and even feet start contracting in order to provide enough force to lift the weight — it’s an unconscious response.

The problem is that the form of the curl itself begins to look incredibly sloppy as he’s unconsciously recruiting other muscles.

Now, what does this mean for handstand training?

The Law of Irradiation for Handstands


Here’s a great video of Otto Arco doing hand balancing and muscle control (which is key for the LOI)

Well, the handstand is an exercise that largely focuses on the shoulders, triceps, lats, forearms, traps, scapular muscles, and your core. However, fully body tension is really needed to maintain proper handstand form. Part of the reason is that having relaxed muscles can throw off your balance with the exercises, but the other factor is that recruiting other muscle groups like your glutes, neck, calves etc. into the handstand will help the required muscles to contract stronger.

“But you said that contracting extra muscles ruined the curler’s form…” Therein lies the difference, unconscious muscle recruitment vs. conscious muscle recruitment.

See, if that bicep curler had muscle control, and could consciously choose to flex other muscles to compensate, he could do so without affecting his form. That way, he wouldn’t lose the benefit on his biceps, and would also increase the benefit to other muscle groups and his overall muscle control.

The same goes for handstand training. If you’re able to consciously recruit different muscles to develop your overall strength in the handstand, you can help to both maintain your form and develop muscle control. Sig Klein, Otto Arco, and Maxick, who are all legendary hand balancers, knew the importance of muscle control and the law of irradiation in training, and used both to their advantages.

Tumbling Illustrated
Tumbling Illustrated on Amazon

Try it out: develop your muscle control, and boost your progress with the law of irradiation.

Then, if you want to try more advanced moves like the handstand pushup, you’ll be more prepared.

Comments { 0 }

Handstand Pushup Variations

handstand pushup variations

Handstand pushup demonstrated by Logan Christopher of Lost Art of Hand Balancing


The handstand pushup is an advanced hand balancing skill that demonstrates shoulder strength, scapular mobility, and a proper challenge to those who are willing. But let’s say, for the sake of argument, that you’ve already achieved the handstand pushup, and are looking for something a bit more thrilling…some handstand pushup variations.

(Note: these handstand pushup variations aren’t only for the advanced trainees. In fact, variation 2 and 3 helped me to achieve my first HSPU, so don’t be afraid to try something new!)


Variation 1 : Lateral Handstand Pushup

Walking and Jumping On Your HandsWalking and Jumping On Your Hands on Amazon

Well first, what would be the benefit of exploring different handstand pushup variations? Without the variations, there is still sufficient opportunity to progressively improve the intensity of the HSPU and get stronger with each turn. With the variations, however, comes the opportunity to increase all-angle strength in your training.

For instance, while the basic HSPU does a lot to strengthen your shoulders, traps, and scapular elevation, this lateral HSPU variation trains scapular protraction, retraction, and upward rotation. In addition, as your mobility increases, you can slow down and exaggerate the lateral movement to emphasize your one arm handstand balancing skill.


Variation 2: (Elevated) Backbend Pushup

Furthermore, your posterior deltoid has a critical role in your handstand stability, as it is the primary shoulder hyperextensor. One of my favorite handstand pushup variations to train for developing that strength is the back bend pushup.

The back bend alone is a powerful stability exercise that, with isometric tension, can provide incredible strength. The integrated strength, posterior deltoid strength, and scapular mobility that you can build from the back bend pushup will do wonders to strengthen your HSPU. To increase the difficulty of this exercise, elevated your feet by putting them onto a wall.

As I said, this exercise was a huge part of the reason I was able to develop the strength and range of motion for the HSPU.


Variation 3: Handstand Walking

Often times as kids, we have an easier time walking in a handstand than we do holding a stable handstand. However, having the strength to walk in a handstand position without compromising the integrity of your form can develop your technique, strength, and mobility fairly quickly.

This is one of my favorite handstand pushup variations to couple with the lateral HSPU, because it does the same work to progressively improve balancing strength on one arm, but has a much sharper focus on the shoulders and triceps because…well, you’re walking.

When you’re searching to advance not just in strength but also in skill, especially with hand balancing, be sure to add some fun and variation to your training, and you’ll be sure to see some results. Be sure to let us know in the comments how these variations help you, or if you’ve tried them before. Finally, if these do improve your training skill, be sure to share!

Comments { 1 }

Developing the QDR Part 2! QDR Lead Up Stunts

Here is a great video by Mike Pinto that is full of tips on different progressions to lead up to a full QDR. Pay attention to your positioning and definitely listen to your body. I’m including some quick breakdown on the static positions, but be sure to watch the video below to also get info on the dynamic positions!

1. The first step to balancing the QDR is to create a supportive tripod using your head as a base. The lead foot is placed on the ground as a balance point to help with stabalization.

Tumbling Illustrated
Tumbling Illustrated on Amazon

12_28_02

2. Next work on increasing your lateral stability by raising your head off of the ground. Keep the balancing foot in place during this progression.

12_28_03

3. For the next progression elevate the balancing foot to increase the load on your elbow and core.

12_28_04

4. Finish off with the static positions slowly releasing the support arm finger by finger and ending with a single arm elbow lever.

12_28_05

Watch the video of Mike as he showcases the static positions and more!

For more single armed maneuvers, check out How to do the One Hand Handstand!

Comments { 0 }

Artistic Balancing on Hand Balancing Canes

A hand balancer from Russia, Nikita Sukhanov, recently released a new video full of powerful balancing moves on hand balancing stands performed in a controlled manner. My favorite parts are at 0:43 and 2:55.

Walking and Jumping On Your HandsWalking and Jumping On Your Hands on Amazon

Apart from great strength and coordination, these and similar hand-balancing moves require a great deal of flexibility. If you’d like to increase ranges of motion, decrease pain and become MUCH more flexible, make sure to check out GMB Focused Flexibility.

Comments { 0 }