Your Flexibility is Holding You Back

One of the most useful things to do in any training is to look at what your weaknesses are. When it comes to most hand balancing and acrobatics, this can be split up into three main areas.

Strength – Let’s face it. Most moves take strength to be able to do and without it you won’t have a chance of doing them.

Learn How to Back Flip in 31 Days
Learn How to Back Flip in 31 Days on Amazon

Skill – Another obvious one. It takes skill which is built up through practice to do anything requiring balance or aerial coordination.

Flexibility – Many people, especially men, don’t want to face this one. Sometimes all you need is to be more flexible.

In certain cases, you can make up for a lack of one, with another. For instance, let’s take the aerial. If you don’t know what that is, think of a no handed cartwheel. A lot of women in gymnastics easily work up to this movement. Why? Two words…

Hip Flexibility.

What is the one area that most men don’t have much flexibility in? Yeah, the hips (myself included but I’m working on it).

Sure, with more power, you can lift yourself higher and accomplish the aerial. I’ve been there. But if you just open up your hips it becomes almost effortless.

Hip flexibility helps for the Aerial

What stops many people in doing handstands? Wrist pain. What helps to cause that? Lack of wrist flexibility. (Been there too)

All the skill in the world won’t help you if you’re in pain and can’t even hold the right position because of it.

When it comes to bridging movements, what stops people? Is it lack of strength or skill? Almost never, but instead it is flexibility. (Believe it or not, the first time I did a hand bridge my back was pretty much straight!)

Of course along with that is having strength in those flexible ranges, and proper stretching will build that too.

With the proper flexibility certain moves become effortless. And that’s what we all want right? Not just being able to muscle our way through a move, but show an ease and grace while doing it, that makes other people go “wow you make it look so easy.”

That’s the idea behind Focused Flexibility. To specifically work on what you need. It’s not some generic stretching program, but is structured to give you what you need.

Tons of people have picked up this new course based on my recommendation. Won’t you join them?

Comments { 2 }

Focused Flexibility Review

In the last post on Acrobatic Stretching we talked about how important flexibility is to your training.

If your flexibility is holding you back, I’ve found a new resource that will allow you to break through those blocks you’ve been having.

This program was very similar to the ideas I had on stretching before hand. Great trainers often think alike.

Trampoline Handbook
Trampoline Handbook on Amazon

Still I picked up a few refinements, not to mention awesome and effective stretches I had not been doing before.

Since adding these in, I feel I’m making even faster progress towards my goal of hip flexibility to do the pancake drill.

In one, a variation of the Supine Dynamic Hip Rotations, I felt my hip cramp up like never before during the stretch. Yet when I was all said and done in the exercise my flexibility was already improved.

It’s affordable and immediately downloadable which means you can start on the program today.

Check it out here.

If you’re looking for something truly ground-breaking with a new scientific breakthru guaranteeing to double your flexibility tonight, this is not it.

But if you want an Easy System, that helps you to target your specific flexibility goals, this is exactly what you need.

What I like about Focused Flexibility is they give you a series of exercises to start with as a baseline. Then they tell you if you can’t do these well, which of the many stretches they show you will help you.

They also target the exercises, to specific conditions, like tight hips, that you may have.

The idea isn’t to do every stretch but to focus on the ones you need to achieve the flexibility you desire.

Read more about Focused Flexibility here.

Perhaps you’ve picked up a program from the Gold Medal Bodies guys before. If so you know they have high quality material. This program is no different.

Comments { 3 }

Acrobatic Stretching

Stretching for acrobatics whether hand balancing or tumbling, is a must. Well, actually I should say flexibility is a must.

But the only way to get flexible is stretching, right?

In most cases yes, but not always. Stretches are just one sub-set of movement that involves getting to your end range of motion. This is then usually held although there are variations here as well.

The truth is you can build your flexibility with movements that don’t involve anything that looks like stretching in some cases. A person that can’t do a full range squat, will improve their flexibility by working on squats, with or without weights. This alone can loosen up the calves, quads, hamstrings, hips and back to where they’ll eventually be able to achieve the full range.

That is one route. Specific stretches aimed at helping this person would be another.

Let’s say you are working on the handstand. Perhaps you need more shoulder or wrist flexibility.

Wrist Stretch

A great stretch for wrist flexibility

What about handsprings? Additional shoulder and back flexibility can help. So can hip flexibility.

If you’re doing bridging movements, you need all around spinal flexibility, not to mention the shoulders and wrists.

I don’t like to “stretch” for stretching’s sake. If you do, that’s fine with me. Some people like it just because they feel good afterwards. But if I’m going to do it, I always have a specific purpose behind it.

My average training, and all the moves I do, give me more then enough flexibility to get through my everyday life, and to keep me generally flexible.

However, if I want to achieve a specific move, sometimes the best, or only route to achieving it is by increasing flexibility. Once again this can take the “movement” route or the “stretching” route. What I do really depends on the move, and in some cases is a combination of the two.

Trampoline Handbook
Trampoline Handbook on Amazon

Now when we talk about stretching, there are several kinds. You have static stretching. You have various forms of isometrics or PNF stretching. Then you have dynamic stretching.

My personal favorite is dynamic. After all, dynamic movement is usually where you want to apply your new found flexibility. Still the others, especially the isometrics version, done right, can be a big help.

In any case, this is the framework of what I do. Pick a goal. Identify the different ways you can get there. Start with what looks like the best route, or often a combination of things. Put this into action. Adapt and continue to experiment from there. This applies to more then acrobatics stretching.

Here’s an example. In my progress towards a straight arm press handstand, I’ve realized one thing. If I had the right flexibility I could do the movement without problem. It’s really not a strength issue!

And the specific drill I’ve been working towards is what’s known as the Pancake. I would wager that most people that could lay their torso flat on the ground, could do a press handstand, if not right away, then with a little more work.

Pancake Stretch

The Pancake Drill (from DrillsAndSkills.com)

Yet having all the strength in the world for bent arm press handstands, is just not enough. I still work on other progressions towards the movement and am making progress. But I realize the biggest thing I can do for this exercise is too improve my hip flexibility. This just illustrates one specific case.

I recently came across a new resource on the topic of flexibility that I’ll be sharing with you later this week.

Comments { 5 }

Kip Up to Handstand

Watch this awesome video of a kip up to handstand.

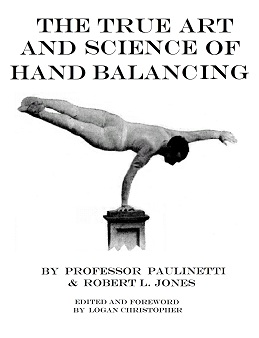
The True Art and Science of Hand Balancing
The True Art and Science of Hand Balancing on Amazon

I came across this video when looking for one showing the jump back to a kip up.

The video starts off with a kip up into a double forward flip done into a foam pit. (This was likely good training for leading up to the following move, as you need to learn to rotate fast out of the kip.)

The kip up is then done into something of an elbow lever, or the bottom of a press, with the legs bent. Of course, from here, it’s relatively simple to press up into the handstand.

This is an awesome move, that I don’t think I’ve seen before. Can anyone else do the kip up to a handstand? Post a link to other videos below.

Comments { 2 }

Jump Back to Kip Up

I received this great question regarding a move that henceforth will be referred to as the Jump Back to Kip Up.

Good morning Logan,
I wanted to thank you for this – It really refreshing to see another person instruct something that is commonly mistaught – spotting.

I had a question. I have seen people in movies, like Crouching Tiger Hidden Dragon, go from a stand to a jump to a leaning back movement that lands them in a position to kip back to stand in pike…can you tell me what that’s called and perhaps how to learn to do it without breaking my neck?

He showed a video from that movie but it was long so I hunted around for a shorter one that shows just this move and I found one.

First of all let’s talk about the name. Just searching to find this video wasn’t easy because I had to try a number of different words to find it. Is their an official name for this move? I am unaware of one, but if it does have one please let me know.

Right now I’m calling it the jump back to kip up. The kip up of course is the name for the jumping up off the ground, so the jump back refers to getting into that position.

So now let’s talk about what it would actually take in order to train for this movement. Let me start by saying that I have not achieved this movement, as I’ve never worked on it. But this is the approach I would take if I wanted to learn it right now.

Number 1 – Master the Kip Up

The kip up is obviously an important part to this movement. It should be easy to do any time you try, before working towards this advanced movement. Though the hands are used in the jump back to kip up, I would build up to the ability to do the kip up hands free.

Number 2 – Handstand Lower to Kip Up

Starting in a handstand position lower down onto the back of your head, with your legs over you. When you can do this, then add the kip up into it. This will train you to go into the kip up without the usually used rolling back method, or just starting on the ground. It works towards the transition that is needed.

Number 3 – Stalled Back Handsprings

Do a back handspring stopping in the handstand position. This is tougher then in sounds. Yet this will build the control and ability you need towards the full movement. If you can stick the handstand you could then lower down and then kip up.

Hand Balancing Made EasyHandBalancingMadeEasy_on_Amazon

Number 4 – Short Back Handsprings

Do the back handspring like before but have less and less jump to it, so that you don’t get a vertical position. Learn to land in control on your hands and your upper back.

It should go without saying that I recommend practicing all these skills in a safe environment.

Putting it All Together

When you watch the video again notice it’s not much of a back handspring and it doesn’t get anywhere close to the handstand position. Still training all these exercises will help you develop that ability.

It may be a slow approach, but just about anyone with dedicated practice should be able to work up to the jump back to kip up.

For lots more tumbling exercises like this one I recommend checking out Tumbling Illustrated. With 248 moves you’re sure to find many you can do, and many you can’t.

Comments { 4 }

Damien Walters Student

If you haven’t heard of Damien Walters then here are a couple old posts with his videos:

How to do the One Hand Handstand by Professor Orlick
ow to do the One Hand Handstand on Amazon

Damien Walters Showreel 2011
Damien Walters Showreel 2010
Damien Walters Showreel 2009

This is one of his newer videos featuring what I am fairly confident this is a student of his, named James Harris. I think the guy being in tie makes it all that much better.

Comments { 0 }

Spotting a Back Hand spring

Here’s a great video on spotting a back hand spring. If you’ve never done this move before, it can be quite scary the first time, so having a spotter, while not essential, is very helpful.

I really like the quote, “The spotter is not responsible for making sure you land on your feet, the spotter is responsible for making sure you do not land on your head.”

This same spotting technique can be done from a standing position, but besides that, it’s the same as what I learned from my gymnastics coach.

Also when doing the back handspring, it can be helpful of thinking about sitting in a chair position before launching. This gives you the proper launching position you need.

For more information including how to learn back hand springs and back flips without a spot I recommend you check out Get Your Backflip Now. Since not everyone has a coach or training partner available to them, it’s a smart option to have.

Tumbling Illustrated
Tumbling Illustrated on Amazon

Try out the back hand spring with this method and then switch people, spotting the back handspring yourself. Leave your comments below.

Comments { 3 }

Handstand Games

Hand balancing is fun. If you can even more fun to your training why not do it? That’s where handstand games can come into play.

We’ll list some handstand games here, but you can come up with your own. Creativity is key!

For any of these games you’ll need two or more people who are approximately at the same level of handstand ability. If one person is way better then another you may need to come up with some other games, as these are best for evenly matched opponents.

Timed Holds
Hold a handstand for time. This can be a regular handstand or a different position from normal. Both people start at the same time and the longer hold wins.

Handstand HORSE
You’ve likely played the basketball game of horse sometime in the past. This is where a person gets a letter if they can’t match what their opponent does. The first person to spell the word HORSE loses. Instead of trying trick shots you’ll do any handstand skill. This can involve holds, walking, hopping, presses, different positions and anything else you can think of.

Handstand Race
There are a couple variations of this game. You an an opponent can go for time and thus speed while handstand walking or running. You can cover a distance and whoever gets there in the least number of attempts would win.

Obstacle Course
This is a great one in a gym where you can easily setup steps or objects to circumnavigate. See who can get through the entire course within falling out of a handstand.

Handstand Battles
This involves actually trying to take the other person out of the handstand while you remain in it. Warning this is more dangerous then any of the other games.

This video with Roger Harrell from Crossfit may give you more ideas of handstand games to play.

Try out some of these games with your friends. You’ll have fun while improving your skills.

If you want more details on how to do all these hand balancing skills and more then I recommend you check out the Hand Balancing Mastery Course.

Learn How to Back Flip in 31 Days
Learn How to Back Flip in 31 Days on Amazon
Comments { 1 }

Best Bboy Video

I don’t know about you but this could be the best bboy video ever. It’s definitely the best I’ve ever seen. When most videos I watch get played through at double speed I’ve watched this one already three times including in slow-mo.

I’ve got nothing to offer you here if you want to do this…though I think that will have to change in the future.

Tumbling Illustrated
Tumbling Illustrated on Amazon

But in the meantime you can learn many other equally amazing skills. Click here to grab something today.

Comments { 8 }

Tuck Handstand

Here is a new handstand exercise that I’ve been playing with lately – the tuck handstand.

What is this move? First you get up into a handstand then you get into a tuck position while keeping the arms straight.

This can be done from a curved handstand or a flat one. You’ll notice there’s quite a bit of arch in the lower back as I do it in the video here. An even more advanced version would be to round the back and hold the position. By keeping your body more vertical then horizontal it is quite a different position then the tuck planche.

What this move requires is the shift your weight forward, planching the shoulders slightly. I found that by bending the legs at the knees first and then bending at the hips it was easier to get into this movement.

Here is a picture of the tuck handstand. If your thighs only go to parallel with the floor as they are here its pretty easy to hold. Lowering them even more makes it tougher. And going into the round back position is the hardest.

Tuck Handstand

Photo by Natalie Anfield - Kamloops Photography

How to do the One Hand Handstand by Professor Orlick
ow to do the One Hand Handstand on Amazon

My thoughts are that this move would help with straight arm pressing movements.

Have you done the tuck handstand before? Any other similar handstand exercises you like to do?

Comments { 3 }