Tag Archives | flexibility

A Gymnastic Skill: The Front Walkover

When you learn how to move, many variations start to become available to you. The transition between your limbs becomes an art form.

Hand Balancing Made EasyHandBalancingMadeEasy_on_Amazon

Lets take hand balancing at two of its base variations. The handstand itself and cartwheel. These are the two inversions that we all tend to start with. I’d wager that a good amount of us began with the cartwheel before the handstand because it gave us a clear pathway to return to.

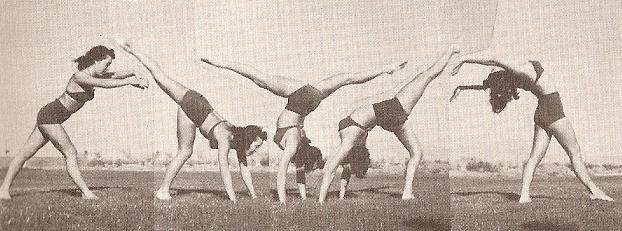
A good way to test your movement capability is to run through different planes of motion. A more difficult possibility move from the cartwheel would be the Front Walkover. If you look below you’ll see a composite picture of Diane Robinson performing the move with ease.


A vintage magazine called Acro-Chat lays down some quick instructions for you. The correct way to do a two arm walkover. Notice the arms are straight all the way through, the legs are extended and split as much as possible, the back is arched tightly with the head and arms trailing as she stands upright.

Now a word of caution, this move does take a large amount of flexibility in both the back and legs. Although its not dangerous, you might end up falling a couple of times in the beginning.

You can also perform a back walkover which is done moving backwards. Just follow the pictures from right to left and you’ll get the idea.

Quick note: These moves are not to be confused with the handspring or back handspring. Though the motion is much the same, except for going off of two legs instead of one, there is another big difference. Your hands will touch the ground before both your feet leave it in a walkover. Handsprings involve leaving the feet to get up in the air before your hands touch down.

If you tested the front walker and see that it might be out of your range, try experimenting with different movement patterns to increase your acumen. If you still need help, try picking up the Gold Medal Bodies Vitamin Program!

Stay Inverted!
-Jonathan Magno


Comments { 0 }

Awesome Abs Exercises 2 – The Hollow Body Hold

Two key Abdominal Exercises to train your core in order to handle to the handstand. In the last section I discussed an exercise that you probably don’t always attribute with the handstand, the Superman Plank.

Today we are going to be going over the inverse of that. This exercise is a staple among gymnastic or athletic movement. Needless to say, the handstand is a definite inclusion into that category.

Lets introduce the Hollow Body Hold.

For the Hollow Body Hold, lie on your back and tighten your abdominals while driving your lower back to the floor.

Extend your arms above your head while keeping your core engaged.

Once you’ve held this position, extend your leg away from your body and lift them away from the floor. Make sure that you point your toes and squeeze your legs together.

For an added touch of alignment, roll your shoulders off of the floor while keeping the body engaged.

There you go guys if you have any questions, don’t be afraid to contact us and one final thing. Don’t forget to pick up The Ultimate Guide to Bodyweight Abs Exercises now!

Stay Inverted!
-Jonathan Magno
Learn How to Back Flip in 31 Days
Learn How to Back Flip in 31 Days on Amazon


Comments { 0 }

Awesome Abs Exercises 1 – Superman Plank

Previously I stated that you can’t become an excellent hand balancer without a strong core.

How do you achieve that? Do normal sit-ups and leg raises cut it? To work on a  strong core with a clean and extended line I have two Exercises for you…

The Superman Plank and the Hollow Body Hold. These two exercises get you to engage the core muscles in an extended fashion. One has more focus on the anterior side and the other on the posterior side. So you become sandwiched in a strong locked position.

Lets start with the Superman Plank

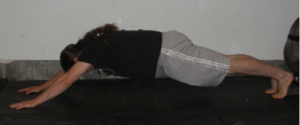
To get into a superman plank, start in a basic plank position with your hips tucked, your glutes engaged and your back straight.

The True Art and Science of Hand Balancing
The True Art and Science of Hand Balancing on Amazon

Be sure to start in the extended arm position. Walk your hands forward until they are at the farthest  position above your head with out breaking form.

Hold this from anywhere between 20 seconds to a minute. If you would like to test yourself, try for even longer!

Give this drill a try and let us know how you do. In the next installment, I’ll be talking about the hollow body hold.

Stay Inverted!
-Jonathan Magno

P.S. To learn more awesome abdominal exercises, get The Ultimate Guide to Bodyweight Abs Exercises now!

Comments { 0 }

The Abdominal Acrobat

I’m going to start this off with a Powerful Statement.

You will NEVER become an excellent hand balancer or acrobat without having incredibly strong abs. The Core is King; or Queen for that matter.

The focus to achieve this on the core is not to get the holy grail six pack (although the side benefit is nice), but to train your body as one unit. Does this sound familiar? It should because that’s exactly what you need do pull off any hand balancing stunt.

The abdominals help to lock you in and keep the hold or stabalized for transitionary movements like the Straddle Press!

Over the next week, I’ll be going over ways to strengthen your core to achieve powerful acrobatic abdominals!

Stay Inverted!
-Jonathan Magno
Trampoline Handbook
Trampoline Handbook on Amazon

P.S. If you can’t wait to build acrobatic adbominals, get The Ultimate Guide to Bodyweight Abs Exercises now!

Comments { 0 }

The Straddle Press Up

Lets see if you’ve noticed a theme here.
Over the past week I’ve been talking about a specific treasure of knowledge. The True Art and Science of Hand Balancing.
In the last entry I gave you a technique found in the book that you would be able to test out. Today, I’m giving you another go-to. This installment involves the Straddle Press Up.
If you need an idea of what it looks like, here is a variation from Logan.

THE STRADDLE PRESS UP.
Sit along a set of parallel bars, or on chair legs with the chair lying on its back, spread the legs apart as far as they will go. With the knees rigid, and toes pointed; catch hold of the legs of the chair just in front of your legs.
Close up, hold the chest high, and stiffen the arms with elbows straight. Then lift the shoulders as high as possible, and lean forward; taking all the weight on the arms and press up to the handstand. As your legs are rising, point the toes, and gradually bring the legs together.
Just as you are up all the way in the balance, hold this a couple of seconds, then lower down slowly with the body and legs straight. You should feel as though you were going to hold the planche, but instead go slowly all the way down through the planche until the feet are on the floor; or in a sitting position, as you started.

Stay Inverted!
-Jonathan Magno
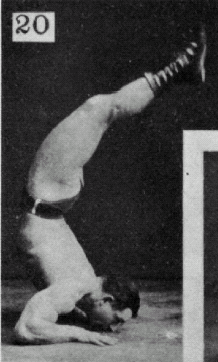
Ultimate Guide to Handstand Pushups
Ultimate Guide to Handstand Pushups on Amazon

P.S. Take a look at the past to develop your hand balancing journey with The True Art and Science of Hand Balancing.

Comments { 0 }

The Tiger Bend

The Tiger Bend!

On top of being a skill to work towards on its own, the tiger bend is also a good way to work up to a full on handstands. Since you are resting on your entire lower arm and hand you have a bigger base with which to balance.

When you get over the fact that it can be an odd position to try and get into, the benefits of the tiger bend start to shine. All the main points of holding a handstand are still there, like keeping tight, but you may have to arch your back a little more for this one.

Though it is a lateral move to the handstand, its also an advanced move that can increase the control and variety of skills you have in your library. It involves going from the Forearm Stand up into a Handstand. With a little overbalancing and strong triceps you can get there.

Since this is a move that can’t be pulled off quickly, here are two easier ways. Do the negative movement which is dropping from a Handstand into a Forearm Stand. When you go for this don’t just fall into the position but control it as much as possible.

You can also do Tiger Bend Pushups. Get in a normal pushup position except you are resting on your forearms instead of the hands. Without any rocking motion pushup on to your hands to the top position and lower back down.

Learn How to Back Flip in 31 Days
Learn How to Back Flip in 31 Days on Amazon

These moves aren’t performed often but that doesn’t mean they aren’t great.

Stay Inverted!
-Jonathan Magno
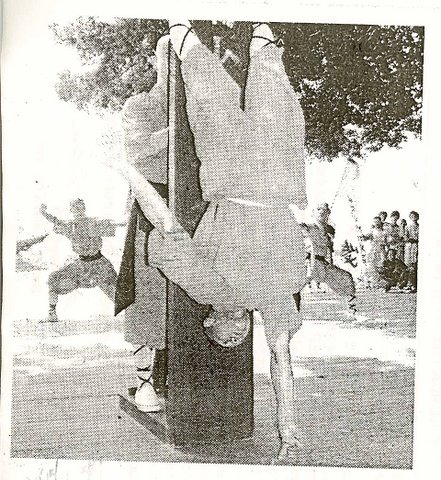
P.S. For the more advanced inverted artist, you can try to duplicate Johnny Weber’s one arm Tiger Bend. Find out how to do it in The True Art and Science of Hand Balancing. The picture above is of Sig Klein from the same book.


Comments { 0 }

The Path of the Shaolin Monk: Training with your Fingers

What’s interesting to me is about how many people have embraced the benefits and fun of being inverted. You can catch people training at a park or even at you’re local gym. Although, if there is one form of hand balancing that you don’t see much of today, its training with your fingers.

But that doesn’t mean you shouldn’t practice it.

Let me start off with a word of caution. The fingers are small and fragile. You have to start off by being mindful of your body while beginning your training; otherwise you may end up breaking them, snapping tendons or any number of bad possibilities. So be careful.

Hand Balancing Made EasyHandBalancingMadeEasy_on_Amazon

Starting with a fingertip handstand is probably too much for most people. Even this most basic move must be worked up to. And fingertip pushups are the best way to do that.

Even without practicing finger balancing, your hand and finger strength will improve over time. Just from the practice of balancing on your hands you can’t help but gain some strength in your digits.

But for true fingertip stunts you need to do them in one form or another.

If you are ready for the fingertip handstand then I suggest using a wall on your first go. Holding your body weight on your fingers is one thing. Balancing is another.

Not only do you have a smaller base of support but you must add pressure in order to stay balanced. This makes your fingers support your weight and then some.

If starting with your finger is still a bit away from your level, but you want to develop your hand balancing, check out our handstand mastery course.

Stay Inverted
-Jonathan Magno


Comments { 0 }

The First Stunt of 2017: Part 2

Elbow Lever

A couple of days ago we talked about the Elbow Lever and gave you a quick lesson on how achieve the skill. If you missed, out I’ll include the lesson at the end of this post just in case.

Today, I’ll be talking to you about a different aspect of the lead-up stunt. The Benefits.

Why is this stunt helpful? It trains the balancing aspect on your hands from a low center of gravity. You also have to keep a decent arch and your body tight or else you will touch the ground with more than your hands.

Internally, these lead-up stunts help to fill in the foundational blocks to understanding how to control your body. Logically, you should strive toward building small successes. The more consistent you are at being successful and learning the intricacies of the moves, the closer you’ll get to that freestanding handstand or more.

Before I forget…

Elbow Lever Quick Lesson:

Walking and Jumping On Your HandsWalking and Jumping On Your Hands on Amazon

To perform this lead- stunt kneel on the floor, bring both elbows together and place them in your stomach and turn the palms of the hands facing upwards. Now lean forwards slowly and place the hands flat on the floor with your fingers pointing backwards. Arch your back slowly until your toes leave the floor and you will be doing the elbow lever.

You will find the balance a little difficult at first but just keep on practicing. The stunt can also be performed on the edge of a table or on the end of any ordinary bed.

Stay Inverted
-Jonathan Magno

P.S. If you want to own your elbow lever or your other hand balance lead-up stunts check out our handstand mastery course.

Comments { 0 }

The First Stunt of 2017: Part 1

There are a number of different possibilities that will lead up to your first handstand. In fact we recommend 5 different lead-up stunts or body skills that can help you achieve this feat.. Whether its the Frogstand, Headstand, their variations or even today’s topic; you’ll gain a valuable piece of information that will help you progress to your goal or even build up to other goals.

Honestly, these lead-up stunts aren’t necessary to get your first handstand, but they build a pathway that can make it easier. All of these body skills share common traits to the handstand and therefore pave the way towards good handbalancing.

The different skills each put you into an inverted position,  develop strength, balance and the motor control necessary to perform a handstand.

So without talking the skills up too much and not delivering, lets give you more insight on the move at hand:

The Elbow Lever

Elbow Lever

Don’t let this move scare you. It is an advanced Hand balancing skill and I’m only starting off with it to give you a long term skill to shoot for. Also, if what I’ve been saying is true, you’ll be able to gain some valuable experience towards you hand balancing Journey.

To perform this lead- stunt kneel on the floor, bring both elbows together and place them in your stomach and turn the palms of the hands facing upwards. Now lean forwards slowly and place the hands flat on the floor with your fingers pointing backwards. Arch your back slowly until your toes leave the floor and you will be doing the elbow lever.

You will find the balance a little difficult at first but just keep on practicing. The stunt can also be performed on the edge of a table or on the end of any ordinary bed.

Now that you know how to do an elbow lever, we challenge you to go ahead and give it a try. Also if you want some pointers, try posting a video on our facebook page and we’ll be there to direct and support you development in your hand balancing journey.

Hand Balancing Made EasyHandBalancingMadeEasy_on_Amazon

Stay Inverted
-Jonathan Magno

BTW if you want to skip some of the process and guesswork toward building you hand balance skills, check out our handstand mastery course.


Comments { 0 }

A broom, your body, and handbalancing!

Everyone has done this at one time or another. A broom is a common item but any long straight object will do just fine.

Put one end on your open palm with the other end straight up in the air and keep it there by balancing.

This is not very difficult and let me tell you why. The broom is straight and solid. Your efforts at balancing it from the bottom translate straight up to the top so it is quite easy to keep it in the air.

Of course, this is related to hand balancing. However, there are some big differences.

Your body is not just one straight long object. You have mobile joints at your elbows, shoulders, hips, knees and ankles. And then there’s your spine which has many moving pieces.

This is not an anatomy lesson. My point is that your efforts of balancing on your hands may not directly translate to keeping your feet in the air.

Your target must be keeping your body from wrists to toes unmoving so that you can balance.

Keeping your body tight is the key to holding a quality handstand. Any leak means getting out of proper position and a much tougher time getting back in.

So stay tight, but don’t forget to breathe.

The True Art and Science of Hand Balancing
The True Art and Science of Hand Balancing on Amazon

In the beginning all this is not as easy as it appears, especially when you are in the unfamiliar upside down position. But keep practicing.

When you can keep your body rigid then handstands are a piece of cake.

Stay Inverted!
-Jonathan Magno
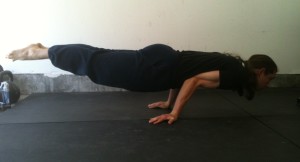
P.S. Although this post is about keeping a straight line, sometimes you need to be a bit more bendable or flexible. Increase your body’s strength and mobility by working on your handstand pushups.


Comments { 0 }