Archive | Planche RSS feed for this section

A Superhero Solution to a Tiring Exercise

The Burpee!

There. I’ve said it.

Love it or hate it. The burpee is a mainstay in most fitness routines. I’ve even used it in my programming, although sparingly. Don’t get me wrong, the burpee is a solid exercise covering many different muscles groups while including strength, balance work, and power development. Although I normally see people use it as an ending metabolic finisher or something to throw in and get their clients tired. Honestly, it actually pains me to watch people run through technique without activating the correct muscles.

There’s a lot going on in that seemingly simplistic exercise, but that’s for another day and another breakdown.

Today I’m going to talk about doing something different with your burpee. Giving it a little bit more mobility, while also working on your motor control and endurance.

I usually breakdown the normal burpee into 3 different pieces. No different here.

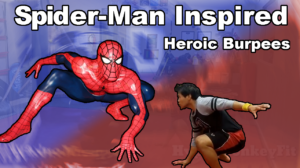
This Superhero burpee includes a forward crawl, lateral jump, and even a cartwheel!

Take a look below to see how you can turn your burpee more superheroic: Spider-Man Style!

If you liked the video and want to develop your body’s endurance and conditioning, check out The Ultimate Guide to Bodyweight Conditioning!

Tumbling Illustrated
Tumbling Illustrated on Amazon

Stay Inverted!
-Jonathan Magno

Comments { 0 }

An Easy Fix to a Pressing Predicament

Today we are going to jump back towards simpler times with a supposedly simple exercise.

The Pushup.

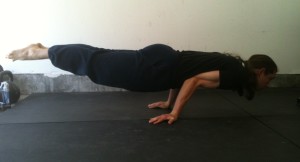
Although it is a seemingly easy exercise, it can cause trouble for some people.

Whether it be sinking of the hips or lack, lack of core engagement, or any of the other number of possible problems.

Don’t worry though.

There are many methods to fix your pushup, and I’ve found a simple way to get you to feel the right movement while using a simple prop.

Take a look at the video below to see the simple tip to a better pushup!

If you liked the handstand pushup in the beginning of the video and want to develop them yourself, check out The Ultimate Guide to Handstand Pushups!

Ultimate Guide to Handstand Pushups
Ultimate Guide to Handstand Pushups on Amazon

Stay Inverted!
-Jonathan Magno

Comments { 0 }

The True Art and Science of Hand Balancing

For many people, today is a special day. I’m not going to get too deep into it, but it does involve a heart, candy, and maybe some stuffed animals.

Hand Balancing Made EasyHandBalancingMadeEasy_on_Amazon

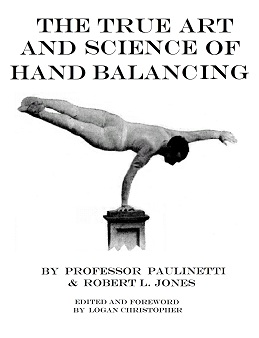
What I am going to get into is a book on hand balancing that can be used as a starting point to learning the handstand correctly as well as a look into the history of hand balancing. This book is called The True Art and Science of Hand Balancing.

The authors of the book, Professor Paulinetti and Robert L. Jones, have a combined experience of 70+ years practicing and teaching hand balancing and gymnastics. In the 1940’s they wrote THE book on this art.

Although we have many guides of information here, this book gives you an inside look at how this skill gained a following in the earlier years. This book is filled with information and insight on hand balancing

Happy Valentines Day and pick up The True Art and Science of Hand Balancing today!

Stay Inverted!
-Jonathan Magno


Comments { 0 }

Refining your Handstand Push up

Earlier we talked about the two types of handstand presses. Today, we’ll go a bit more into an often utilized bent arm version. The handstand pushup.

Many people begin their hand balancing against a wall. This was the case for me and I know its the same for many others.

On top of that holding a handstand while doing pushups is one of the ultimate bodyweight exercises for your upper body; with or without a wall.

Think of the upper body strength attainable by being able to rep out a freestanding handstand pushup. You can find many admirable people with supreme strength attain this move. These range from the different BAR groups like the Bar Brothers to the movement groups like GMB.

Whichever method you choose, one thing is for certain. Strength and balance are key.

One thing I noticed that tends to throw people off is their hand and arm position.

If you were to kick up against a wall to do pushups what position would you take? Is this the same position you’d take away from the wall?

Play around with the width and angle of you hands and arms and you will find you can change the difficulty of handstand pushups considerably

Discover the newfound strength in your presses with our Ultimate Guide to Handstand Push-ups Bundle.

The True Art and Science of Hand Balancing
The True Art and Science of Hand Balancing on Amazon

Stay Inverted!
-Jonathan Magno


Comments { 0 }

The Division of the Handstand Press

When you finally understand the mechanics of the handstand, it no longer takes that much strength to perform it. But if you want to start building some inverted strength, start progressing to the handstand pushup.

handstand pushup variation

Handstand pushup demonstrated by Logan Christopher of Legendary Strength


Handstand Presses can be broken down into two main groups. The straight arm and the bent arm press.

The True Art and Science of Hand Balancing
The True Art and Science of Hand Balancing on Amazon

The various bent arm presses take a high degree of strength in the shoulders, triceps and also the chest in many cases.

Straight arm press-ups still take strength but in different areas. Also you will need flexible wrists, hamstrings, and the ability to compress your body in half. In fact the more flexibility you have the less strength you will need.

For all these reasons most people will be better at either straight arm or bent arm presses. There are many people who can do the straight arm variety but will fall on their face if they have to bend their arms.

On the other hand most strong people can do many bent armed presses. These take tremendous arm and shoulder strength to pull off successfully as you have to hold your entire bodyweight in mid air for a length of time. But for these people the straight arm presses can be elusive.

In the end true mastery comes from being able to do both. In order to do this you must train for both.

Presses are not easy, especially if you haven’t been training as a gymnast. But it can be done.

If you’ve ever wondered why hand balancers are so strong this is one of the major keys. So start pressing.

If you need some help in getting started with presses, why not check our Ultimate Guide to Handstand Push-ups Bundle.

Stay Inverted!
-Jonathan Magno


Comments { 0 }

Hand Balancing and Cross Training with Weights?

Will weight-lifting help you with your hand balancing skill? That’s a tricky question, although not too difficult. The answer is YES and NO.

I’m going to expound on the idea. First off, weight-lifting is a ranged term which can involve power lifting, olympic lifts, bodybuilding, or old-fashioned strength training. A big qualifier on your results is in how you lift.

Certain exercises are going to help you out. And others won’t do much for you.

Specifically for pressing movements. It requires a tremendous amount of strength to be able to push your own body overhead. You need strong triceps, shoulders, and core.

Since many of the inverted presses take you through different planes of movement; not strictly overhead work, like the frogstand press, you will also need strong pectoral muscles in addition to the core.

So strengthening these muscles will make your stunts easier.

Then again hand balancing takes a huge degree balance. While weightlifting can help your coordination, it is nothing compared to what you need to stand on your hands.

Being able to press a heavy barbell overhead has no carryover to being able to hold a handstand.

A handstand is a skill and needs to be practiced in order for you to get good at it.

These days many people are moving away from weights because they think they are not functional. You know what? It just depends on what you’re doing with them.

Whether you decide to build you upper body strength with barbell presses or with handstand pushups is up to you. They both build strength.

So in short, look at what your own goals are and see what will work best for your situation.

If you need some help in getting started, why not check out our Handstand Mastery Course.

Stay Inverted!
-Jonathan Magno

Tumbling Illustrated
Tumbling Illustrated on Amazon


Comments { 0 }

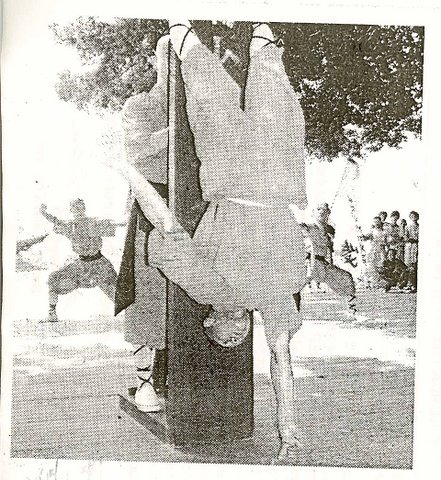
The Path of the Shaolin Monk: Training with your Fingers

What’s interesting to me is about how many people have embraced the benefits and fun of being inverted. You can catch people training at a park or even at you’re local gym. Although, if there is one form of hand balancing that you don’t see much of today, its training with your fingers.

But that doesn’t mean you shouldn’t practice it.

Let me start off with a word of caution. The fingers are small and fragile. You have to start off by being mindful of your body while beginning your training; otherwise you may end up breaking them, snapping tendons or any number of bad possibilities. So be careful.

Starting with a fingertip handstand is probably too much for most people. Even this most basic move must be worked up to. And fingertip pushups are the best way to do that.

Even without practicing finger balancing, your hand and finger strength will improve over time. Just from the practice of balancing on your hands you can’t help but gain some strength in your digits.

But for true fingertip stunts you need to do them in one form or another.

If you are ready for the fingertip handstand then I suggest using a wall on your first go. Holding your body weight on your fingers is one thing. Balancing is another.

Not only do you have a smaller base of support but you must add pressure in order to stay balanced. This makes your fingers support your weight and then some.

If starting with your finger is still a bit away from your level, but you want to develop your hand balancing, check out our handstand mastery course.

Tumbling Illustrated
Tumbling Illustrated on Amazon

Stay Inverted
-Jonathan Magno


Comments { 0 }

The First Stunt of 2017: Part 2

Elbow Lever

A couple of days ago we talked about the Elbow Lever and gave you a quick lesson on how achieve the skill. If you missed, out I’ll include the lesson at the end of this post just in case.

Today, I’ll be talking to you about a different aspect of the lead-up stunt. The Benefits.

Why is this stunt helpful? It trains the balancing aspect on your hands from a low center of gravity. You also have to keep a decent arch and your body tight or else you will touch the ground with more than your hands.

Internally, these lead-up stunts help to fill in the foundational blocks to understanding how to control your body. Logically, you should strive toward building small successes. The more consistent you are at being successful and learning the intricacies of the moves, the closer you’ll get to that freestanding handstand or more.

Before I forget…

Elbow Lever Quick Lesson:

To perform this lead- stunt kneel on the floor, bring both elbows together and place them in your stomach and turn the palms of the hands facing upwards. Now lean forwards slowly and place the hands flat on the floor with your fingers pointing backwards. Arch your back slowly until your toes leave the floor and you will be doing the elbow lever.

You will find the balance a little difficult at first but just keep on practicing. The stunt can also be performed on the edge of a table or on the end of any ordinary bed.

Stay Inverted
-Jonathan Magno

P.S. If you want to own your elbow lever or your other hand balance lead-up stunts check out our handstand mastery course.

Learn How to Back Flip in 31 Days
Learn How to Back Flip in 31 Days on Amazon
Comments { 0 }

The First Stunt of 2017: Part 1

There are a number of different possibilities that will lead up to your first handstand. In fact we recommend 5 different lead-up stunts or body skills that can help you achieve this feat.. Whether its the Frogstand, Headstand, their variations or even today’s topic; you’ll gain a valuable piece of information that will help you progress to your goal or even build up to other goals.

Tumbling Illustrated
Tumbling Illustrated on Amazon

Honestly, these lead-up stunts aren’t necessary to get your first handstand, but they build a pathway that can make it easier. All of these body skills share common traits to the handstand and therefore pave the way towards good handbalancing.

The different skills each put you into an inverted position,  develop strength, balance and the motor control necessary to perform a handstand.

So without talking the skills up too much and not delivering, lets give you more insight on the move at hand:

The Elbow Lever

Elbow Lever

Don’t let this move scare you. It is an advanced Hand balancing skill and I’m only starting off with it to give you a long term skill to shoot for. Also, if what I’ve been saying is true, you’ll be able to gain some valuable experience towards you hand balancing Journey.

To perform this lead- stunt kneel on the floor, bring both elbows together and place them in your stomach and turn the palms of the hands facing upwards. Now lean forwards slowly and place the hands flat on the floor with your fingers pointing backwards. Arch your back slowly until your toes leave the floor and you will be doing the elbow lever.

You will find the balance a little difficult at first but just keep on practicing. The stunt can also be performed on the edge of a table or on the end of any ordinary bed.

Now that you know how to do an elbow lever, we challenge you to go ahead and give it a try. Also if you want some pointers, try posting a video on our facebook page and we’ll be there to direct and support you development in your hand balancing journey.

Stay Inverted
-Jonathan Magno

BTW if you want to skip some of the process and guesswork toward building you hand balance skills, check out our handstand mastery course.


Comments { 0 }

Underwater Handstands and where to spot?

Is doing an underwater handstand a good idea? Read below for that and other questions from readers like you. Remember that if you want your questions answered just email them to me. I can’t personally reply to all of them but I will post them for all to see.

Here’s the first one:

Thank you so much for the good tips. I am just a beginner of the hand stand on land. I already know how to do headstand (“King of Yoga” ). I also do good hand stand and hand walk underwater in the swimming pool at my local LA Fitness. In fact I handwalked the entire length of the pool in one breath few days ago. But I find it much more difficult to do hand stand on land. Shall I keep practicing underwater hand stand and hand walk while trying to learn hand stand on land? Will I pick up “bad habits” while doing the underwater hand balancing?
Best regards, Brian Ko

Now I have never heard this one before. Not having practiced in the water it is hard to say for sure but here are my feelings.

Water is going to give you some resistance for you to push off of. This is why it is easier. When you balance on land you cannot push off the air in this manner. I imagine that you will be balancing with your body rather than your hands for the most part. If you want to be able to do a handstand on land then you should be practicing that.

The other thing is holding the breath. Obviously this must be done if you are underwater, and unless you have great lungs you won’t be able to balance for a long time. However, in hand balancing you do not want to hold your breath. A big key, and also something hard to learn, is to be able to breathe normally when you practice.

My advice is to stick to the land. It is harder but you will get the hang of it. There may be some benefit from practicing underwater but I the time would be better spent on solid ground.

And from our friend Seth:

Hello, I was wondering where is the best place to look while you are in a handstand, I find myself always looking at the ground, but recently I started trying to look forward and keeping neck straight. Which way is correct? Thank you for all your help it is very much appreciated.

Both are correct depending on what you are going for. Most of the time I look at the ground. I find this position easier. Remember that the back tends to follow the head, so if you are looking at your hands then you will naturally arch.

Now if you look forward then your back will straighten out and this will give you the straight handstand look and feel. Once you get use to this position it can be just as easy as the other one.

It all depends on what you are going for but both are correct for hand balancing.

That wraps it up for today.

Good Luck and Good Hand Balancing,
Logan Christopher

PS   Jonathan here! If you need more guidance in 2017 toward your handbalancing goals, try out our Handstand Mastery Program!

 

Learn How to Back Flip in 31 Days
Learn How to Back Flip in 31 Days on Amazon
Comments { 0 }