Archive | Walking & Jumping RSS feed for this section

Handstand Pushup Variations

handstand pushup variations

Handstand pushup demonstrated by Logan Christopher of Lost Art of Hand Balancing


The handstand pushup is an advanced hand balancing skill that demonstrates shoulder strength, scapular mobility, and a proper challenge to those who are willing. But let’s say, for the sake of argument, that you’ve already achieved the handstand pushup, and are looking for something a bit more thrilling…some handstand pushup variations.

(Note: these handstand pushup variations aren’t only for the advanced trainees. In fact, variation 2 and 3 helped me to achieve my first HSPU, so don’t be afraid to try something new!)


Variation 1 : Lateral Handstand Pushup

Well first, what would be the benefit of exploring different handstand pushup variations? Without the variations, there is still sufficient opportunity to progressively improve the intensity of the HSPU and get stronger with each turn. With the variations, however, comes the opportunity to increase all-angle strength in your training.

For instance, while the basic HSPU does a lot to strengthen your shoulders, traps, and scapular elevation, this lateral HSPU variation trains scapular protraction, retraction, and upward rotation. In addition, as your mobility increases, you can slow down and exaggerate the lateral movement to emphasize your one arm handstand balancing skill.


Variation 2: (Elevated) Backbend Pushup

Furthermore, your posterior deltoid has a critical role in your handstand stability, as it is the primary shoulder hyperextensor. One of my favorite handstand pushup variations to train for developing that strength is the back bend pushup.

The back bend alone is a powerful stability exercise that, with isometric tension, can provide incredible strength. The integrated strength, posterior deltoid strength, and scapular mobility that you can build from the back bend pushup will do wonders to strengthen your HSPU. To increase the difficulty of this exercise, elevated your feet by putting them onto a wall.

As I said, this exercise was a huge part of the reason I was able to develop the strength and range of motion for the HSPU.


Variation 3: Handstand Walking

Often times as kids, we have an easier time walking in a handstand than we do holding a stable handstand. However, having the strength to walk in a handstand position without compromising the integrity of your form can develop your technique, strength, and mobility fairly quickly.

This is one of my favorite handstand pushup variations to couple with the lateral HSPU, because it does the same work to progressively improve balancing strength on one arm, but has a much sharper focus on the shoulders and triceps because…well, you’re walking.

When you’re searching to advance not just in strength but also in skill, especially with hand balancing, be sure to add some fun and variation to your training, and you’ll be sure to see some results. Be sure to let us know in the comments how these variations help you, or if you’ve tried them before. Finally, if these do improve your training skill, be sure to share!

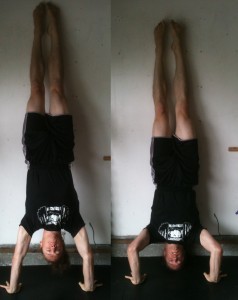
Ultimate Guide to Handstand Pushups
Ultimate Guide to Handstand Pushups on Amazon
Comments { 1 }

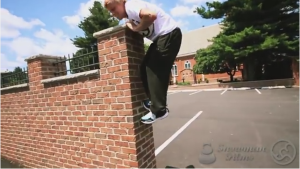
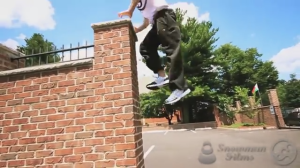
Parkour From Scratch #2 – Climb Up Tutorial – How to start Parkour

Hey guys! It’s been a while. Logan and I have been working on the back-end putting some stuff together for you all and I also caught some nasty bug that’s been going around in my area. I wanted to come back strong with something that could put your autonomy, body feel, and endurance to the test. Today, we’re bringing you another segment of Parkour From Scratch with the Climb Up!

03_9_01

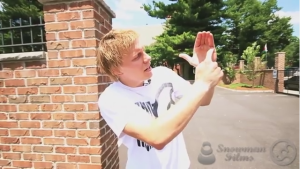
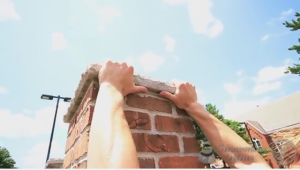
The first thing that TranquilMVMT looks at in this tutorial is your grip when you go into the climb.  Some people prefer to grip with the fingers themselves and others with the base of the fingers. Test it out, and see what works for you!

How to do the One Hand Handstand by Professor Orlick
ow to do the One Hand Handstand on Amazon

03_9_0203_9_03

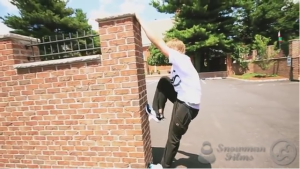
The next thing you want to do is figure out which driving foot you feel most comfortable with. Start first in a hanging squat position and then switch legs to see what would work best. Quick note is also to try and see if how long you can hold yourself up.

03_9_04

Lastly they discuss different ways of driving up from the elbow post, muscles up, and even utilizing a hip drive!(If you don’t know what I mean by hip drive, check out our A-Frame tutorial)

03_9_0503_9_06

Once again their videos are packed with info, so I suggest to watch below and get in-depth!

Parkour is all about getting from point A to point B in the most effective way possible. In order to do that, you have to feel mastery over your own body. With that said, we’ve got an awesome deal this month to jam-pack yourself with the information necessary to gain that mastery. Click Here to develop to start you on the course to Advanced Bodyweight Training!

Stay Inverted!
-Coach Jon

Comments { 1 }

Some Inspiration from 47 year old Freerunner

Hey guys! If you don’t know much about me, know that I started in on movement training at a later age. I’ve always done the martial arts and have trained in combat sports, but working on tying it together into a cohesive art of self expression didn’t happen till later. I’ve still got a long way to go, but its great to see what others have accomplished even later in life!

P.S. No highlights in this one. Just watch the video as it is, you won’t regret it!

Trampoline Handbook
Trampoline Handbook on Amazon

Only a couple of days left to pick up the Advanced Bridging Course. You’ve heard us talking about over the past month and you can get it by clicking here!

Stay Inverted!
-Coach Jon

Comments { 0 }

Parkour From Scratch #1 – Shoulder Roll Tutorial – How to start Parkour

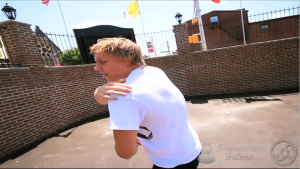
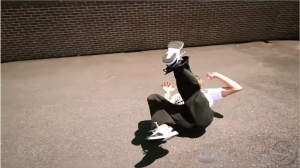
Hey guys! As you know, we’ve been looking for ways to really develop your acrobatic base and all your acrobatic skills. In this series, you will be getting the information you need to start in parkour from scratch! The first tutorial is all about the Shoulder Roll.

02_23_01

The first thing you want to do is focus on rolling out from your shoulder to your opposing hip. More specifically, you should start rolling from your trap or scapula and not the deltoid.

02_23_02

The next thing you want to do is either crunch or tighten your abs. That way you have a rigid surface to push off of the floor!

02_23_03

When putting it all together, create a diamond shape on the floor, pull your arm in, crunch abs, and roll forward from your shoulder to hip!

02_23_04

There you go guys! Here is the full video for you.

Tumbling Illustrated
Tumbling Illustrated on Amazon

Acrobatics are about autonomy and being mindful of your own movement. The Advanced Bridging Course February sale is almost over so don’t forget to grab it in order to build that strong and dynamic core necessary for acrobatics. To get the course, click here!

Stay Inverted!
-Coach Jon

Comments { 0 }

Great Tricks To Try

Skills like hand balancing, hand spins, tumbling, flexibility tricks are serious tricks that can only be achieved through continuous training and practice. Hand spins and flexibility tricks are good way to keep your body in shape even when doing a solo act. While advanced hand balancing and flexibility skills are nicer when done in pair or with a group.

Dan had been practicing some of these skills for the past 2 years, at least. Do you think you can do better in a shorter training time?

How to do the One Hand Handstand by Professor Orlick
ow to do the One Hand Handstand on Amazon


Comments { 0 }

Handstand Walk Tutorial

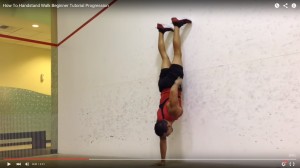
After working on and perfecting your very first handstand, the next step is to learn how to walk on your hands. This video will show you step by step, in a progressive manner how to pull off your first handstand walk.

1. 30 Seconds Nose to Wall Handstand Hold

This is a very important step in order to improve your balance skills before making your initial walk. First, slowly get a firm grasp of the floor while moving your feet onto the wall. Then slowly push yourself towards the wall while taking one step at a time until you reach 90 degrees. Lastly, hold your position for about 30 seconds.

1

2. Hip Touches

This is the step where you are trying to teach your hands and arms to stand on their own while the other one is reaching your hip. Remember to shift some of your body weight to the left as you reach your right hip with your right hand and vice versa. This will help you avoid falling to the side of the hand that you’re using to touch your hip. Do this repetitively until you’re arms are comfortable with standing on one at a time.

Ultimate Guide to Handstand Pushups
Ultimate Guide to Handstand Pushups on Amazon

2

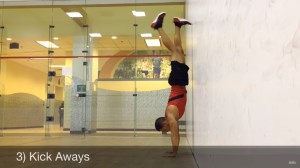
3. Kick Aways

Now you are starting to do the actual handstand walk. Slowly kick yourself away from the wall as you move your hands and arms forward one at a time as if you’re starting to learn how to walk using your feet. Slowly move your feet forward, past your body in order to keep the center of gravity near your body. After a few steps, you can go back to start and repeat the process until you reach the right balance in shifting the center of gravity while taking a step using your hands and arms.

3

4. Walk Aways

Walking away from the wall is like doing the actual handstand walk whereas you are using the wall as your starting position.

4

5. Practice

This is the last part where you apply what you learned when starting the handstand and the first four steps above.

5

If you’re looking for an in-depth book on handstand walking, make sure to check out Walking and Jumping On Your Hands by Professor Orlick.

Comments { 4 }

Creative Moves by Gravity & Other Myths

Today’s video comes from a bunch of people who look like they’re on a vacation, but still manage to pull out some amazing moves in combination of free running, hand balancing and other amazing stuff – like playing a piano with a hand balancer on top of you!

Walking and Jumping On Your HandsWalking and Jumping On Your Hands on Amazon

This uplifting video comes from Gravity & Other Myths, a well-known Australian acrobatics ensemble.

Are you interested in any of my training programs or books? Then make sure to sign-up to my newsletter here TODAY and you’ll receive a special coupon code tomorrow (5/13/2015) for 30% off on my products!

Comments { 0 }

Crazy Hand Balancing Feats

Regular handstands just don’t cut the mustard for you anymore? How about hand balancing on rolling dumbbells or high-fiving a friend in between handstand push-ups on a barbell? Yeah, that should do it.

Learn How to Back Flip in 31 Days
Learn How to Back Flip in 31 Days on Amazon

These and similar feats can get pretty taxing on the wrists, so think twice before trying to replicate them. It would be wise to master balancing on hand balancing stands first.

Comments { 0 }

Develop Strength for One Arm Handstand

Today’s video comes from Chris Silcox and it’s an excellent one focused on building strength for one arm handstand, assuming you’re already comfortable with the regular handstand. It’s jam-packed with different exercises that’ll keep you busy for months.

You can take action right away by practicing these drills and begin your journey to the one arm handstand today. Expect for last two drills which require hand balancing blocks and hand balancing stands, you don’t need anything else beside a wall. What are you waiting for?

How to do the One Hand Handstand by Professor Orlick
ow to do the One Hand Handstand on Amazon
Comments { 6 }

Few Tips to Help You Master One Hand Handstand Hops

Performing a one arm handstand is hard enough, but if you’re already advanced enough you might be interested in a few tips on how to do one arm handstand hops. Shen from Runaway Circus crew makes it looks easy, but it’s definitely something that requires a lot of practice.

Hand Balancing Made EasyHandBalancingMadeEasy_on_Amazon

Depending on your abilities, you may start with a regular handstand and then transfer to a one hand handstand or just go straight for the one hand handstand. From there on make sure to use your knees and hips to launch yourself toward the sky, instead of just kicking with your legs. Use that momentum and power from the hips to keep going.

If you’d like to learn other jumping moves, like Clapping Jumps, Jumps for Distance, Jumping Up and Down Stairs and much more, make sure to check out Walking and Jumping on Your Hands by Professor Orlick.

Comments { 0 }