Tag Archives | Good Luck

What Trampoline should I use?

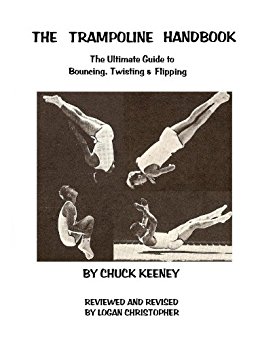
With the release of the Trampoline Handbook I’ve received a few questions on what type and size of trampoline I recommend.

To do the tricks in the book you’ll need to be able fully layout on the trampoline. For this reason I recommend a trampoline that is at least 10 feet wide. And the bigger the better. Just gives you more room to do the tricks safely.

As to shape the standard round trampoline works fine, but the square or rectangular versions are great too.

As far as brands or where you get them a simple search on google for ‘trampolines’ will find you many places selling them. Or most likely you can buy them locally in your area.

And once you have it set up the real fun begins. See the Trampoline Handbook to find out how you can get started in tons of beginner and intermediate trampolining tricks.

Good Luck and Good Trampolining,
Logan Christopher

Hand Balancing Made EasyHandBalancingMadeEasy_on_Amazon
Comments { 0 }

Handstand Visualization

You may have heard me mention it before. I’m talking about visualization and how it can help you do better in hand balancing and acrobatics.

There’s a new article on the site telling my story of how I reached my first ever 30 second handstand.

How Visualizing Can Help Your Handstands

Make no mistake about it, this is powerful stuff and can be the difference between success and failure. You even got scientific proof backing it up.

Go check it out – Handstand Visualization

Ultimate Guide to Handstand Pushups
Ultimate Guide to Handstand Pushups on Amazon

Good Luck and Good Hand Balancing,
Logan Christopher

Comments { 0 }

How to Kick-up into a Wall Handstand

It’s important to have a strong handstand against the wall before you ever try balancing yourself in the open.

And in order to train that you have to be able to get into the handstand. This video shows you the easiest way to kick-up against the wall.

Learn How to Back Flip in 31 Days
Learn How to Back Flip in 31 Days on Amazon


How to Kick Up into a Handstand Against the Wall

The most important point is to keep your arms locked the entire time. That makes them strongest and you’ll be least likely to collapse to the ground.If you don’t quite get it on your first attempt keep at it. If you’re worried about injuring yourself put a pillow or something soft beneath your head to build your confidence.

Also, you can have a partner assist you. After you kick they can guide your feet to the wall.

As for how much kick to give, you need enough to get your hips above your body but not so much you plow into the wall. With practice you’ll be able to touch lightly on the wall every time.

Good Luck and Good Hand Balancing,
Logan Christopher

P.S. This is just the first step of many in the Secrets of the Handstand Quick Start DVD. If you want to work up to balancing on you own this is the DVD to get.

Comments { 0 }

What's Stopping Your Handstands?

Today’s message is just for beginners. That is people still working on holding the regular freestanding handstand. If that’s you then keep reading.

I’d say two thirds of the people that come to my website are just getting started and trying to learn the handstand.

Even though it’s the basic foundational move of all hand balancing it still can prove to be frustrating, especially when you first get started. I know it was for me.

I’m going to be releasing a few videos in the upcoming days that will help you along. The thing I always tell people is that you don’t want to start with the handstand itself but more on that topic later.

For now I want to hear what’s holding you back? If you can’t hold a freestanding handstand for more than 5 seconds what’s stopping you for holding 10 or 20 seconds?

Or do you not know why you can’t get the balance?

Before you comment down below just know that I’ll try to answer your problems in these new videos.

Hand Balancing Made EasyHandBalancingMadeEasy_on_Amazon

Plus you’ll hear about my first handstand attempts, what others have done and more. I think you’ll get a kick out of them.

Good Luck and Good Hand Balancing,
Logan Christopher

Comments { 0 }

Handstand Hand Isometrics

It’s been awhile since I’ve put up a full article on the site.

Well, there’s a new one up there now. This one shows you an exercise to build stronger wrists specifically to help you balance better.

Tumbling Illustrated
Tumbling Illustrated on Amazon

Handstand Hand Isometrics

Give it a try and let me know how it works for you. And its just the first of many more articles to come.

Good Luck and Good Hand Balancing,
Logan Christopher

P.S. If you missed the announcement of the new Trampoline Handbook be sure to go check it out.

Comments { 0 }

Hand Placement in Handstands

Here’s an interesting question.

“I can only hold a handstand for about five seconds, with all fingers spread out, but when I bend in my right index finger I can hold for 15 seconds on up.  What should I do?”
Matthew Romero

If you can hold it longer with your fingers bent then that’s probably what you should do. I’m not to sure why bending that single finger helps you so much but here’s a more general reason why you should bend the fingers.

Because balancing on the hands can be difficult to do you want to give yourself the widest base possible. This means you spread your fingers out. As in spacing your fingers and not keeping them together.

But you don’t want them fully extended. Keep your fingers slightly curled and this helps you to grip the ground harder. With more grip you can balance easier.

How to do the One Hand Handstand by Professor Orlick
ow to do the One Hand Handstand on Amazon

By using your hands in this way you’ll have more control and that means you stay up in a handstand longer.

On a different note, I’m going to be having a few important announcements in the next couple of weeks. Make sure you stay tuned.

Good Luck and Good Hand Balancing,
Logan Christopher

P.S. If you need help getting started with your handstand check out my Secrets of the Handstand Quickstart guide.

Comments { 0 }

Handstands When Your Wrists Hurt

A common problem many beginners have with handstands is that their wrists can’t take it.

I know the feeling. From a football injury back in high school my right wrist has never been the same. Its less flexible and even hurts when too much pressure is put on it in certain ways.

Trampoline Handbook
Trampoline Handbook on Amazon

Actually working on handstands to regain that flexibility has helped a lot over the years. But recently, due to some other work its been flaring up again.

This means any handstands I do, I’m favoring and leaning to my left side which isn’t good. But there is a way to work around the problem.

And that is doing handstands on bars. Many objects will work; parallettes, pushup handles, kettlebells and more. As long as its stable you can do hand balancing on it.

At first you may have difficulty balancing since it changes the way your hands have to move, but with a little practice it’ll get easier, even more so than balancing on flat ground since you can grip it hard.

So if you have any wrist troubles hop on some bars to give your wrists much needed relief. Even if you don’t use these tools to change up the feel of your handstands.

And if you’re doing advanced moves where the wrist must bend even more, like in a planche or some presses, again the bars can be a big help.

Good Luck and Good Hand Balancing,
Logan Christopher

P.S. I write more about wrist issues in a special report you can find in the Hand Balancing Mastery Course.

Comments { 0 }

Sig Klein Tribute


Video of Sig Klein

Sig Klein has to be one of my favorites of the old time strongman. He was just such a perfectly developed athlete. And he did it all from weightlifting, various feats of strength, to muscle control and more.

Not the least of which were his hand balancing abilities. In The True Art and Science of Hand Balancing Bob Jones compliments Sig on his planche, saying it’s the best he’s ever seen of a man of Klein’s size.

A few of Sigmund Klein’s favorite skills were the Tiger Bend and handstand press-ups, usually done between two chairs.

This video is a tribute to a few of the things he did.

Trampoline Handbook
Trampoline Handbook on Amazon

Good Luck and Good Hand Balancing,
Logan Christopher

Comments { 0 }

Videotape Your Handstands and Acrobatics

“Whoa, that’s what I’m doing? No wonder I‘m not pulling it off”

It wasn’t the first time I said that phrase and it wouldn’t be the last.

Back in gymnastics I liked to bring in a digital camera to take video of myself performing moves. I’d leap upwards to do a back flip and land it real low.

After seeing the film I knew my takeoff was too far back and not straight up where it needed to be. Even though I THOUGHT I was jumping straight up.

Especially when you are starting out it can be difficult to tell what you are doing. You are concentrated on just completing a move without hurting yourself that you can’t tell exactly where you are in space.

But when you watch yourself from the outside you can see it with ease. You can see the little details of what you’re doing. And this makes it easy to correct most of the time.

I’ve used it a lot for acrobatic moves but it’s equally helpful for hand balancing.

Even just a picture can help. Because you can compare your position to a picture of someone who is much better and find out what you’re doing right and what you’re doing wrong.

Trampoline Handbook
Trampoline Handbook on Amazon

Most of the time what you think you’re doing is not what is actually happening. And that can be the difference between pulling off a move and failing miserably.

Even if you don’t personally own a camera, you probably know someone who does. If you want to get better and do it faster using a camera is a must-use tool.

The tip for today is to start recording yourself.

Good Luck and Good Hand Balancing,
Logan Christopher

P.S. If you need a video to compare your handstand to, not to mention a step-by-step plan to get there, check out the Secrets of the Handstand Quickstart Guide.

Comments { 0 }

Injury-Proofing Your Ankles

A subscriber wrote in after the release of the Parkour Tutorial DVD with a warning. Thanks again Adam for bringing it to my attention.

Tricking, Parkour, even gymnastics can be rough on the ankles. Sprains, strains, and broken ankles are unfortunately not that uncommon.

In order to avoid this you want to do two things. First off, you want to make sure you can do moves within your capabilities. Don’t start off jumping off of two story buildings.

Secondly, prepare for the worst. Make your body more resilient. The stretches on this video will help prepare your feet and ankles for landings and all the impact.

Trampoline Handbook
Trampoline Handbook on Amazon


Injury-Proofing Your Ankles

And if you take part in running, these same moves will injury-proof you so that no pot-hole is likely to roll your ankle.

Just add a few of these moves to your regular routine and you’ll be better off no matter what you do.

Good Luck and Good Training,
Logan Christopher

P.S. Of course you need to know how to do the moves properly. If you want to get started in Parkour this is the video for you.

Comments { 3 }