About Jon Magno

Author Archive | Jon Magno

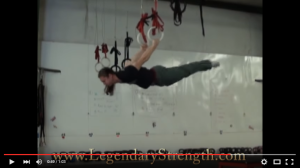
Acrobatic Attributes: A GMB Elements Review

So, we’ve been talking a lot about foundation recently. Especially on how to get your body accustomed to all types of 3d movement. It can be scary, I won’t lie. Its a constant cycle, but after the initial work gets easier like the progress from walking, to running, to sprinting. Take myself for example, when I started on this journey of movement I was just like how most of you probably were in the beginning. NO IDEA what to do or which direction to take. Even with all the quick info out there, its hard to pull everything together in an easy to follow manner. Luckily you’ve got people like Logan who’ve done the hard work and can help you reach that level that you want to achieve.

The work is consistent but its a gratifying journey. The reason I’m talking about this is because i want to open you up to a way of making this body skill passion easier. As you know, our friends over at Gold Medal Bodies have been at the body skill game for multiple years. In their big pot of experience and talents, they’ve narrowed down the necessary attributes needed to develop any acrobatic skill. This information is compiled together in their Elements Program. Which we use of inspiration for our evolving outlook on handstand and hand balancing development.

I’ve always been a person about simplicity and the Elements Program accomplishes this by having you focus on 3 movement patterns in a progressive fashion over the course of 7 weeks. Even after a few days, I began to understand the value of the information. Although not just myself; my own clients have benefited with their own hip mobility and stabilization, which for some of them has been 2 years of work. Every piece of information is meticulously detailed and compliments each other.

The True Art and Science of Hand Balancing
The True Art and Science of Hand Balancing on Amazon

As I said, the program is broken down into 7 weeks with 6 days of training. The main goal is to build necessary strength and conditioning, but more importantly to understand your body. As the weeks go by, Ryan and the GMB team start adding more tweaks as well as give you the guidance to work on your own free flow floor work.

If you’ve never been inverted or have never tried any acrobatic feat, be sure to pick up the GMB Elements Program. I can’t recommend it enough!

02_12_01

Stay Inverted!
-Coach Jon

Comments { 0 }

AcroYoga Beginner Tutorial – AcroYoga poses (with instructions)

In today’s post, Noga goes over a few different Acro poses that you can do with your partner. Its going to take a lot of coordination, flexibility, and stabilization to put them together so make sure you have a comfortable foundation before you get started!

02_10_01

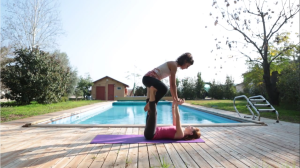
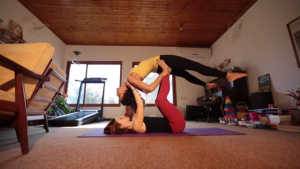
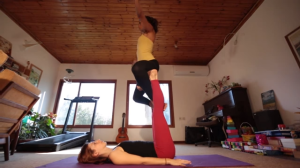
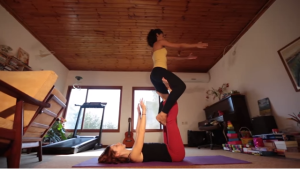
The first Pose is the Bird to Full Bow.  As you are going through the pose, be sure to keep your arms extended in case your flyer loses balance during the transition.

02_10_02a 02_10_02b

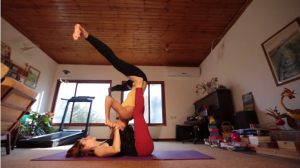
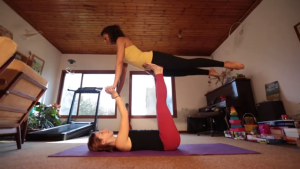
Next up is the Throne to Mermaid Pose.

02_10_03a 02_10_03b

The True Art and Science of Hand Balancing
The True Art and Science of Hand Balancing on Amazon

You can also get more detailed info on these as well as catch the other poses Nataraj and High Flying Whale by watching the clip below!

Don’t forget guys, we’ve got a great deal on the advanced bridging program this month. If you’re looking to really increase your flexibility, check it out here!

Stay Inverted!
-Coach Jon
Comments { 0 }

1 Min Tip: Acrobatic Attributes – Shoulder Opener

Hey Guys! Here’s the next update to our Acrobatic Attributes series of videos to help give you a better foundation! One of the keys to that foundation is to have loose muscles that can react and move in 3d. The Shoulder Opener Stretch is a great way to open up your shoulders and increase mobility to your posterior side while up in an inverted position!


02_08_01

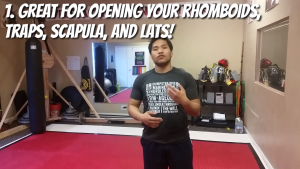
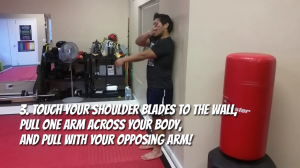
The Shoulder Opener is a great way to open up your rhomboids, traps, scapula, and lats.

02_08_02

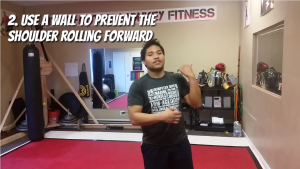
One of the key factors to doing the move correctly is to make sure the shoulders stay in a neutral position. You can easily accomplish this by placing your shoulder blades on a wall and using that as a focus point.

02_08_03

Pull one arm across the mid-line of your chest and use the opposing arm to pull it in place. Rather than pressing the arm towards your body, think about pulling your arm to the opposite side.(For my martial arts folks, think sticky hands!)

02_08_04

You can watch the 1 min tip here!

How to do the One Hand Handstand by Professor Orlick
ow to do the One Hand Handstand on Amazon

Don’t forget a lot of these great tips were inspired by our friends from Gold Medal Bodies. So if you are looking to really develop your foundational range of motion and flexibility for acrobatics, check out the GMB Focused Flexibility program here: https://lostartofhandbalancing.com/go/focusedflexibility/

Comments { 0 }

1 Min Tip: Acrobatic Attributes – The A Frame

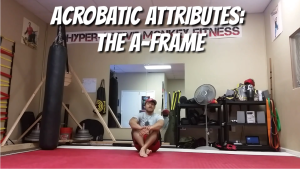
Logan and I are always looking for ways to increase the effectiveness of  you training with handbalancing and luckily we’ve found a great resource from our friends at Gold Medal Bodies. This new set of videos that were inspired by the wealth of information in their foundational programs will simultaneously develop your strength, mobility, and biomechanics needed for acrobatics.

Here is the  first video in the Acrobatic Attributes Series: The A Frame

02_05_01

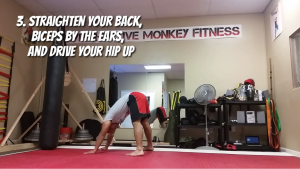
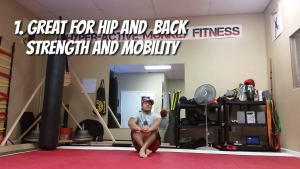
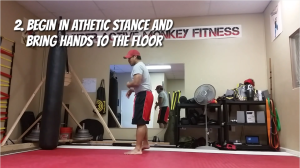
The A Frame is a great position to work on in order to build your hip and back strength and mobility. It will teach you how to use your hips for lead up stunts like the kick-up wall handstand or the kick-up in general!

02_05_02

You want to start out in an Athletic Stance and then bring your hands to the floor.

02_05_03

One of the key components you want to pay attention to is the straightening of your legs and back while keeping your biceps by your ears and driving your hip up!

How to do the One Hand Handstand by Professor Orlick
ow to do the One Hand Handstand on Amazon

02_05_04

Be sure to check out the full 1 min. tip below.

Also if you are looking to really develop your foundation for anything in your acrobatic skillset check out the GMB Elements program here: https://lostartofhandbalancing.com/go/elements/

Comments { 0 }

AcroYoga Beginner Tutorial – Straddle Bat

Ok guys! In today’s post, we’ll be jumping once again into the AcroYoga series with Noga. Today Noga will be working with the Straddle Bat or Back to Bat Position.

02_3_01

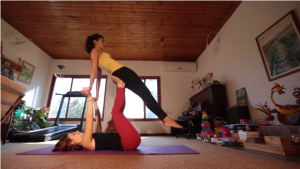
She starts out by placing having her flyer rest their glutes on her feet. The flyer leans back and clasps the hands of the base.

02_3_02

The True Art and Science of Hand Balancing
The True Art and Science of Hand Balancing on Amazon

Next the flyer releases the hands of the base and stabilizes on the feet.

02_3_03

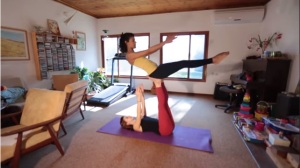
The flyer slowly leans back and the base creates a new post on the flyers shoulders.

02_3_04

Finally the Flyer becomes inverted into the straddle position. (Note the change in foot placement.)

02_3_05

To get the full tutorial with tips, watch the video below!

Allright guys! As you can see flexibility on the part of the flyer is important for this position. If you want to build a strong back with mobility and stability check out our Advanced Bridging Course here!

Stay Inverted!
-Coach Jon
P.S.  Stay tuned for Friday as we’ll be unveiling our new set of 1 min tips that will help you build a strong foundational base for your acrobatic skills!

Comments { 0 }

AcroYoga Beginner Tutorial – Throne

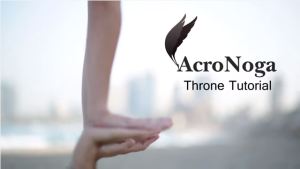
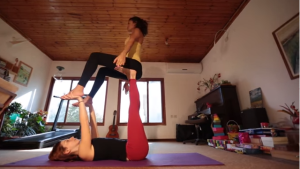
In today’s post. We’ll be revisiting Beginner AcroYoga with the The Throne Tutorial. Noga runs you through four different variations as well as spotting tips.

02_1_01

1) The first position is the Basic Mount.

02_1_02

2) Next Noga runs you through the Straddle Throne position.

02_1_03

3) Followed by it’s opposite, the Reverse Throne.

02_1_04

4) Finally, she takes you through your first transition with the  Bird to Throne position.

02_1_05

Take a look at the full video below!

Walking and Jumping On Your HandsWalking and Jumping On Your Hands on Amazon

If you want to get better at hand balancing with a systematic approach, check out our Handstand Mastery Course!

Stay Inverted!
-Coach Jon
Comments { 0 }

A Celebratory Ring Challenge!

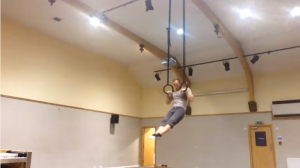
Hey Guys! In today’s post, we have a fun and quick challenge for you. The year is getting off to a great start and people are losing weight, building muscle, and most importantly development their mindful movement. So we wanted to kick things off with an easy challenge we found to test you. Micheal demonstrates a conditioning circuit of 3 exercises with 5 reps each in succession. Try these 3 and see the immense strength that you can build!

1)Muscle – Ups

01_30_01

2)Dips

Trampoline Handbook
Trampoline Handbook on Amazon

01_30_02

3)Pull-Ups

01_30_03

Watch the full video below!

If the conditioning challenge was hard, you still have a chance to get the revamped Rings One Program and if you act before tonight ends, you can receive two special bonuses including shoulder health and a conditioning workout using the gymnastic rings!

Stay Inverted!
-Coach Jon
Comments { 0 }

Blast From the Past: Back Lever Leg Raises

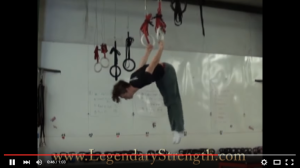
Hey guys! Check out this blast from the past on the Gymnastic Rings from Logan! In this Video, Logan performs a Back Lever into a Leg Raise.

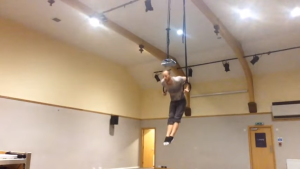
01_29_01

Back Lever Leg Raises are a great way to mimic a Reverse Hyper Machine while using Rings.

01_29_02

How to do the One Hand Handstand by Professor Orlick
ow to do the One Hand Handstand on Amazon

Take a look at Logan’s demo below!

Don’t forget that our friends at Gold Medal Bodies have revamped their Rings One Program and if you act before tomorrow ends, you can receive two special bonuses including shoulder health and a conditioning workout using the gymnastic rings!

Stay Inverted!
-Coach Jon
Comments { 0 }

Getting Started with the Gymnastic Rings!

In today’s Post, we’ll be looking at a beginner ring workout you can do, to develop great control and upper body strength from our friends at Gold Medal Bodies!

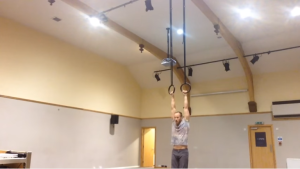
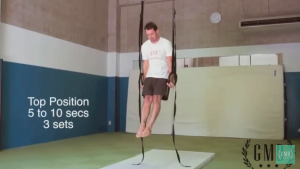
The First exercise is the Top Position. This is the first exercise in the workout flow. Make sure to lock in your lats and be careful not to shrug your shoulders.

01_28_01

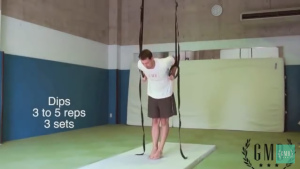
The Second exercise are dips. Keep the same stabilized positioning from the Top Position. Lower your body without letting your shoulders pass the rings.

01_28_02

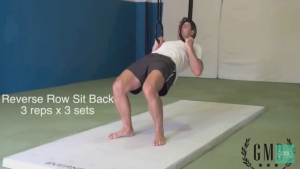
Third we have the Reverse Row Sit. An important detail of this move is that rather than just sitting back, make sure your row towards the rings, drive up your hips, and clinch your glutes.

01_28_03

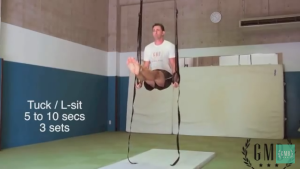
We have two variations for the fourth exercise. Test out the Tuck first so you can build your stabilization strength with the L-sit.

01_28_04

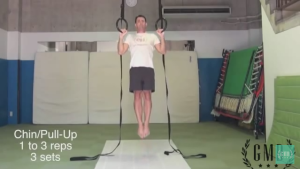
The final exercise is either a chin or pull-up. The focus here is on the strict pulling motions, so be sure not to perform a kip-up during this exercise.

01_28_05

Watch the full video to get a full breakdown of the exercises!

Gold Medal Bodies has been a strong leader in body weight development over the years. They’ve just recently revamped their Rings 1 training program. If you want to build a strong Upper Body of Olympic Levels, check out Rings 1.

Hand Balancing Made EasyHandBalancingMadeEasy_on_Amazon

Stay Inverted,
-Coach Jon

P.S. If you act before 1/30/16, you can receive two special bonuses including shoulder health and a conditioning workout using the gymnastic rings!

Comments { 0 }

We want to know what you think!

Hey guys! As most of you know, we’ve been setting things up for the coming year. We want to make LAOHB better than ever for you. But in order to do that we will be testing a few things as well as getting feedback from you all as we keep walking forward!

With that said, we have a quick survey we would like all of you to fill out so that we can start heading in the new direction! You can find it here!

20160127_093913

Also, on the note of a new direction. Our friends revamped one of their programs. If you’re looking for a way to build your shoulder and stabilization in a fashion that elevates rather than inverts, check out Rings One!

Hand Balancing Made EasyHandBalancingMadeEasy_on_Amazon

Stay Inverted!
-Coach Jon
Comments { 0 }